
A dedicated sending domain lets your emails come directly from your own brand instead of the platform's shared sending servers. This helps your messages reach the inbox, protects your sender reputation, and gives your contacts a more trustworthy experience.
Important: If you're using a brand new domain that has never sent email, warm it up before emailing a large list. Skipping the warm-up can lead to poor deliverability.
What Is a Dedicated Sending Domain?
By default, emails sent from your account show the platform's sending servers in the "sent on behalf of" or "sent via" line of the email header.
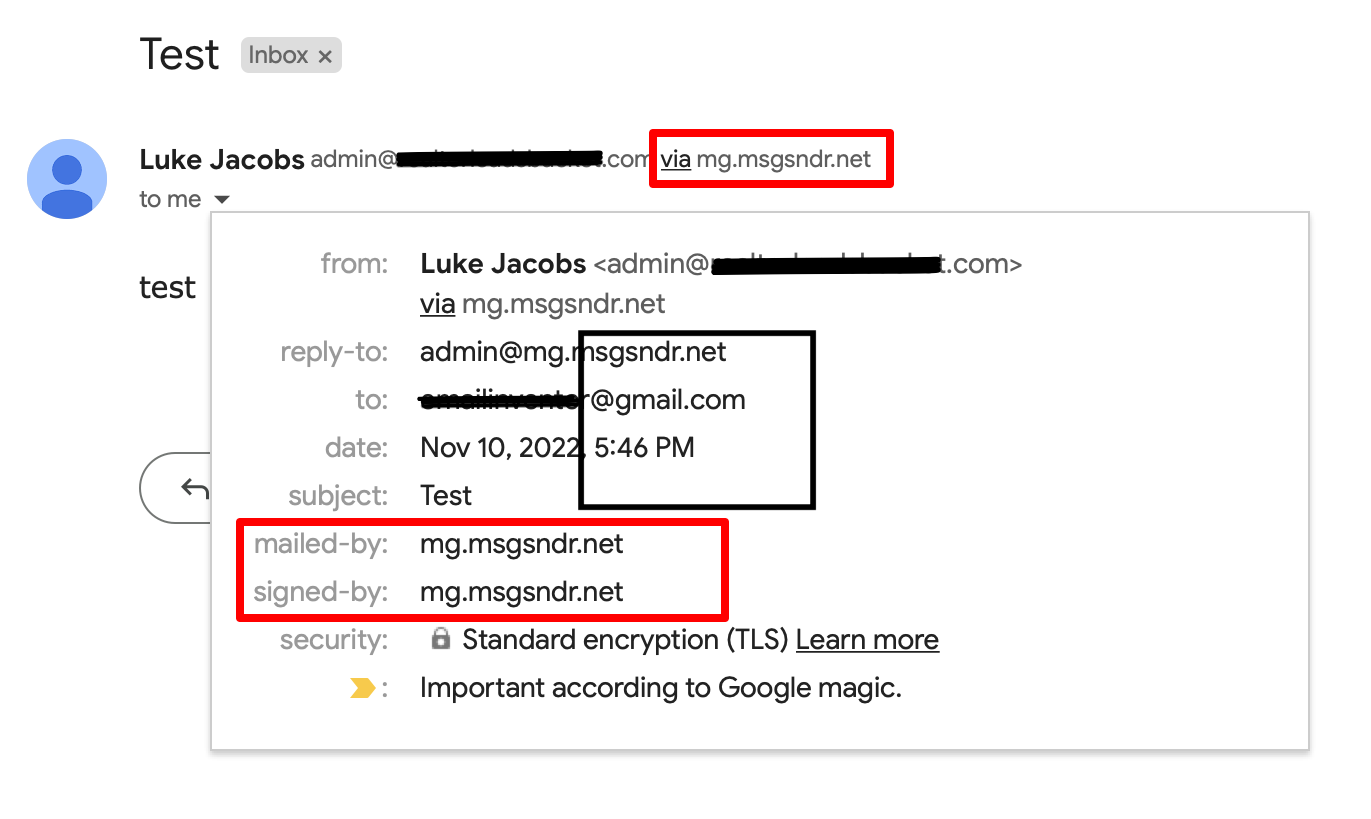
When you set up a dedicated sending domain, your emails are sent from your own domain instead. You can create more than one sending domain and use different ones for different types of email, such as one-to-one emails, workflow emails, marketing emails, and payment or invoice emails.
Step 1: Open Email Services
- Go to Settings > Email Services.
- Click Dedicated Domain and IP.

Step 2: Add Your Domain
- Click Add Domain.
- Enter the subdomain you want to send from (for example, mg.yourbrand.com).

What is a subdomain? A subdomain is a version of your main (root) domain with a word added in front. If your root domain is yourbrand.com, you could use mg.yourbrand.com or mail.yourbrand.com. Use a subdomain that isn't being used for anything else.
Step 3: Verify Your DNS Records
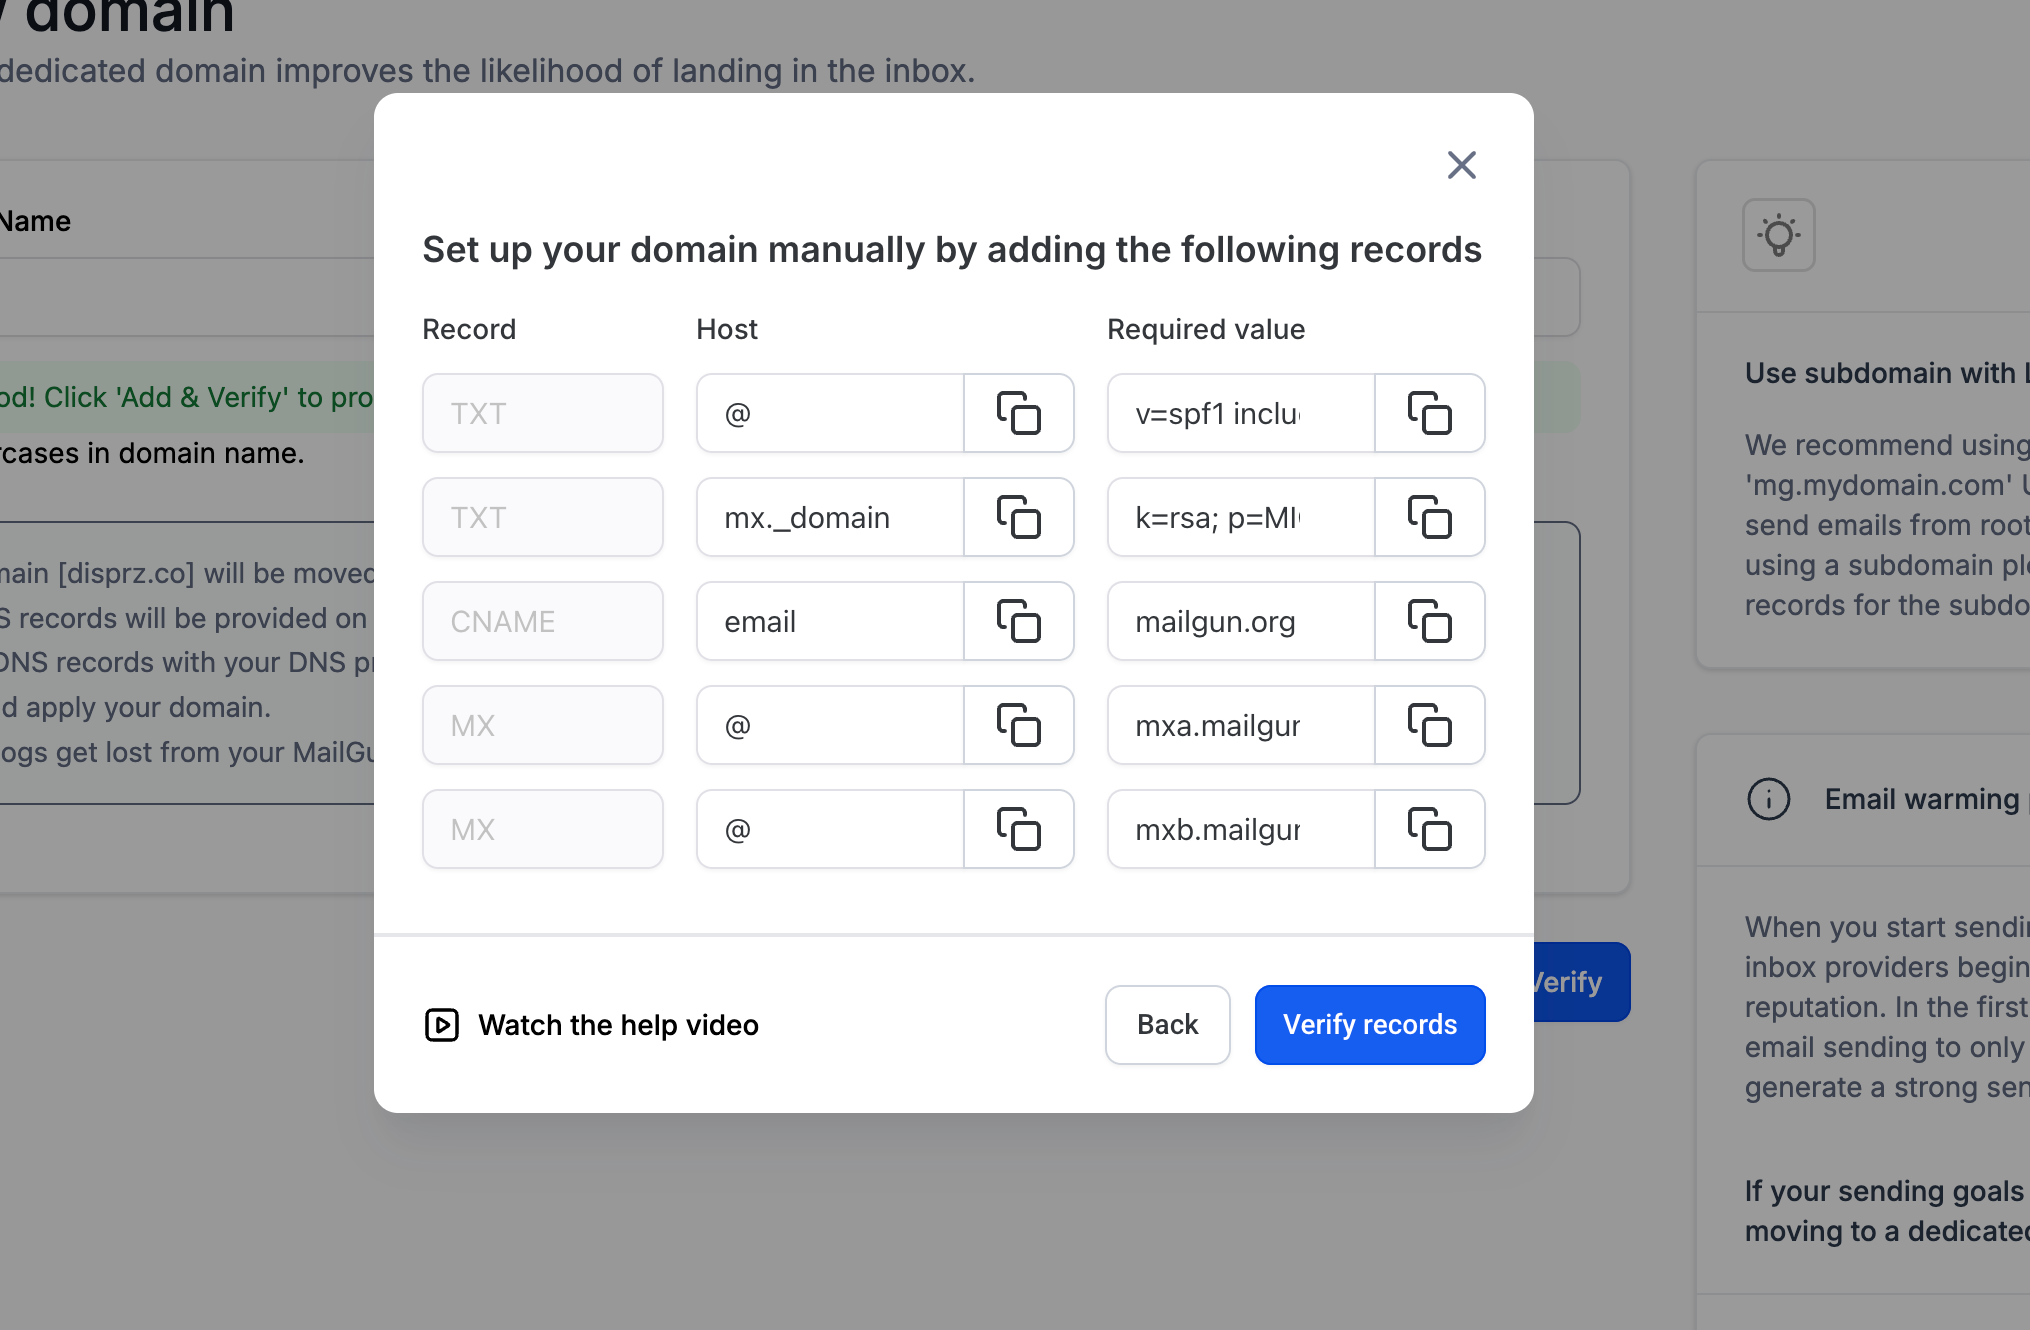
Once your subdomain is added, you'll need to verify its DNS records. Captivation Hub can set these up for you automatically. If automatic setup isn't available for your domain provider, you'll add them manually.

Adding DNS records manually: Log in to the provider where you manage your domain (for example, GoDaddy, Namecheap, or Cloudflare) and create each record using the exact values shown in Captivation Hub. Then return to Captivation Hub and verify.

Good to know:
- DNS changes can take up to 24 hours to take effect. If it has been longer than that, double check your records.
- Only one DKIM record per domain is supported.
Step 4 (Optional): Use a Dedicated Domain for Calendar Emails
You can assign a dedicated sending domain just for appointment emails, such as confirmations, reminders, and reschedules. Keeping these separate helps protect the delivery of time-sensitive messages.
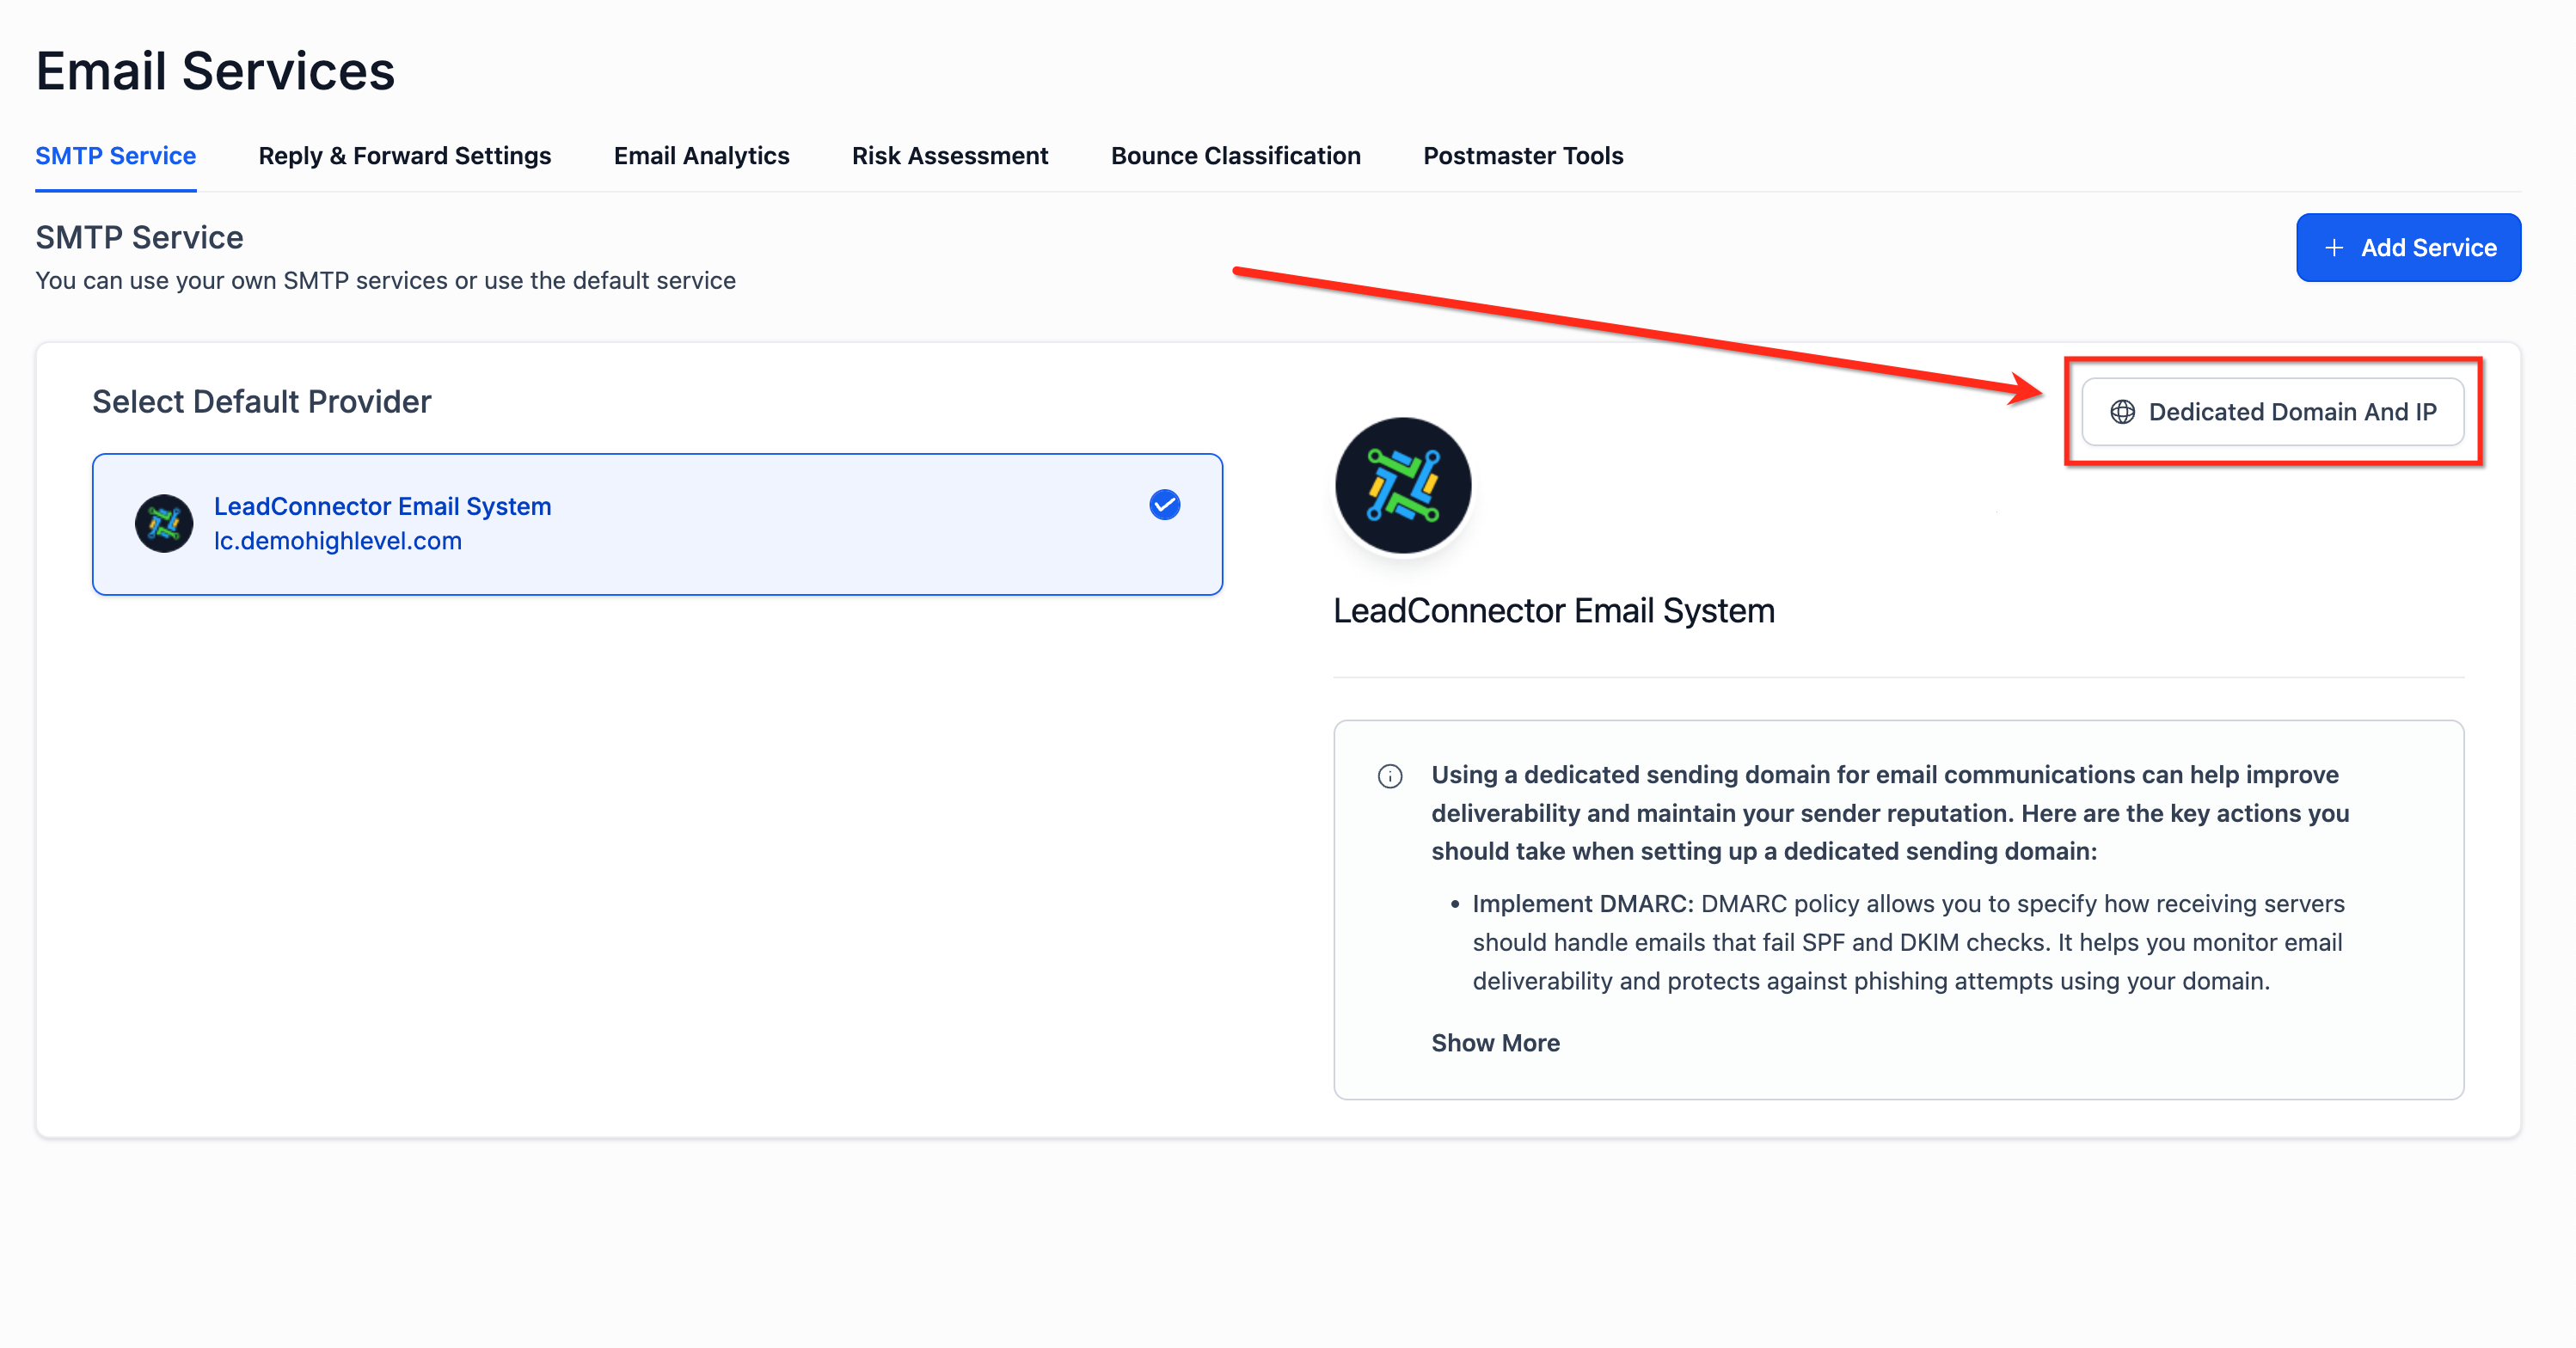
- Go to Settings > Email Services > SMTP Service.
- Select Dedicated Domain and IP.
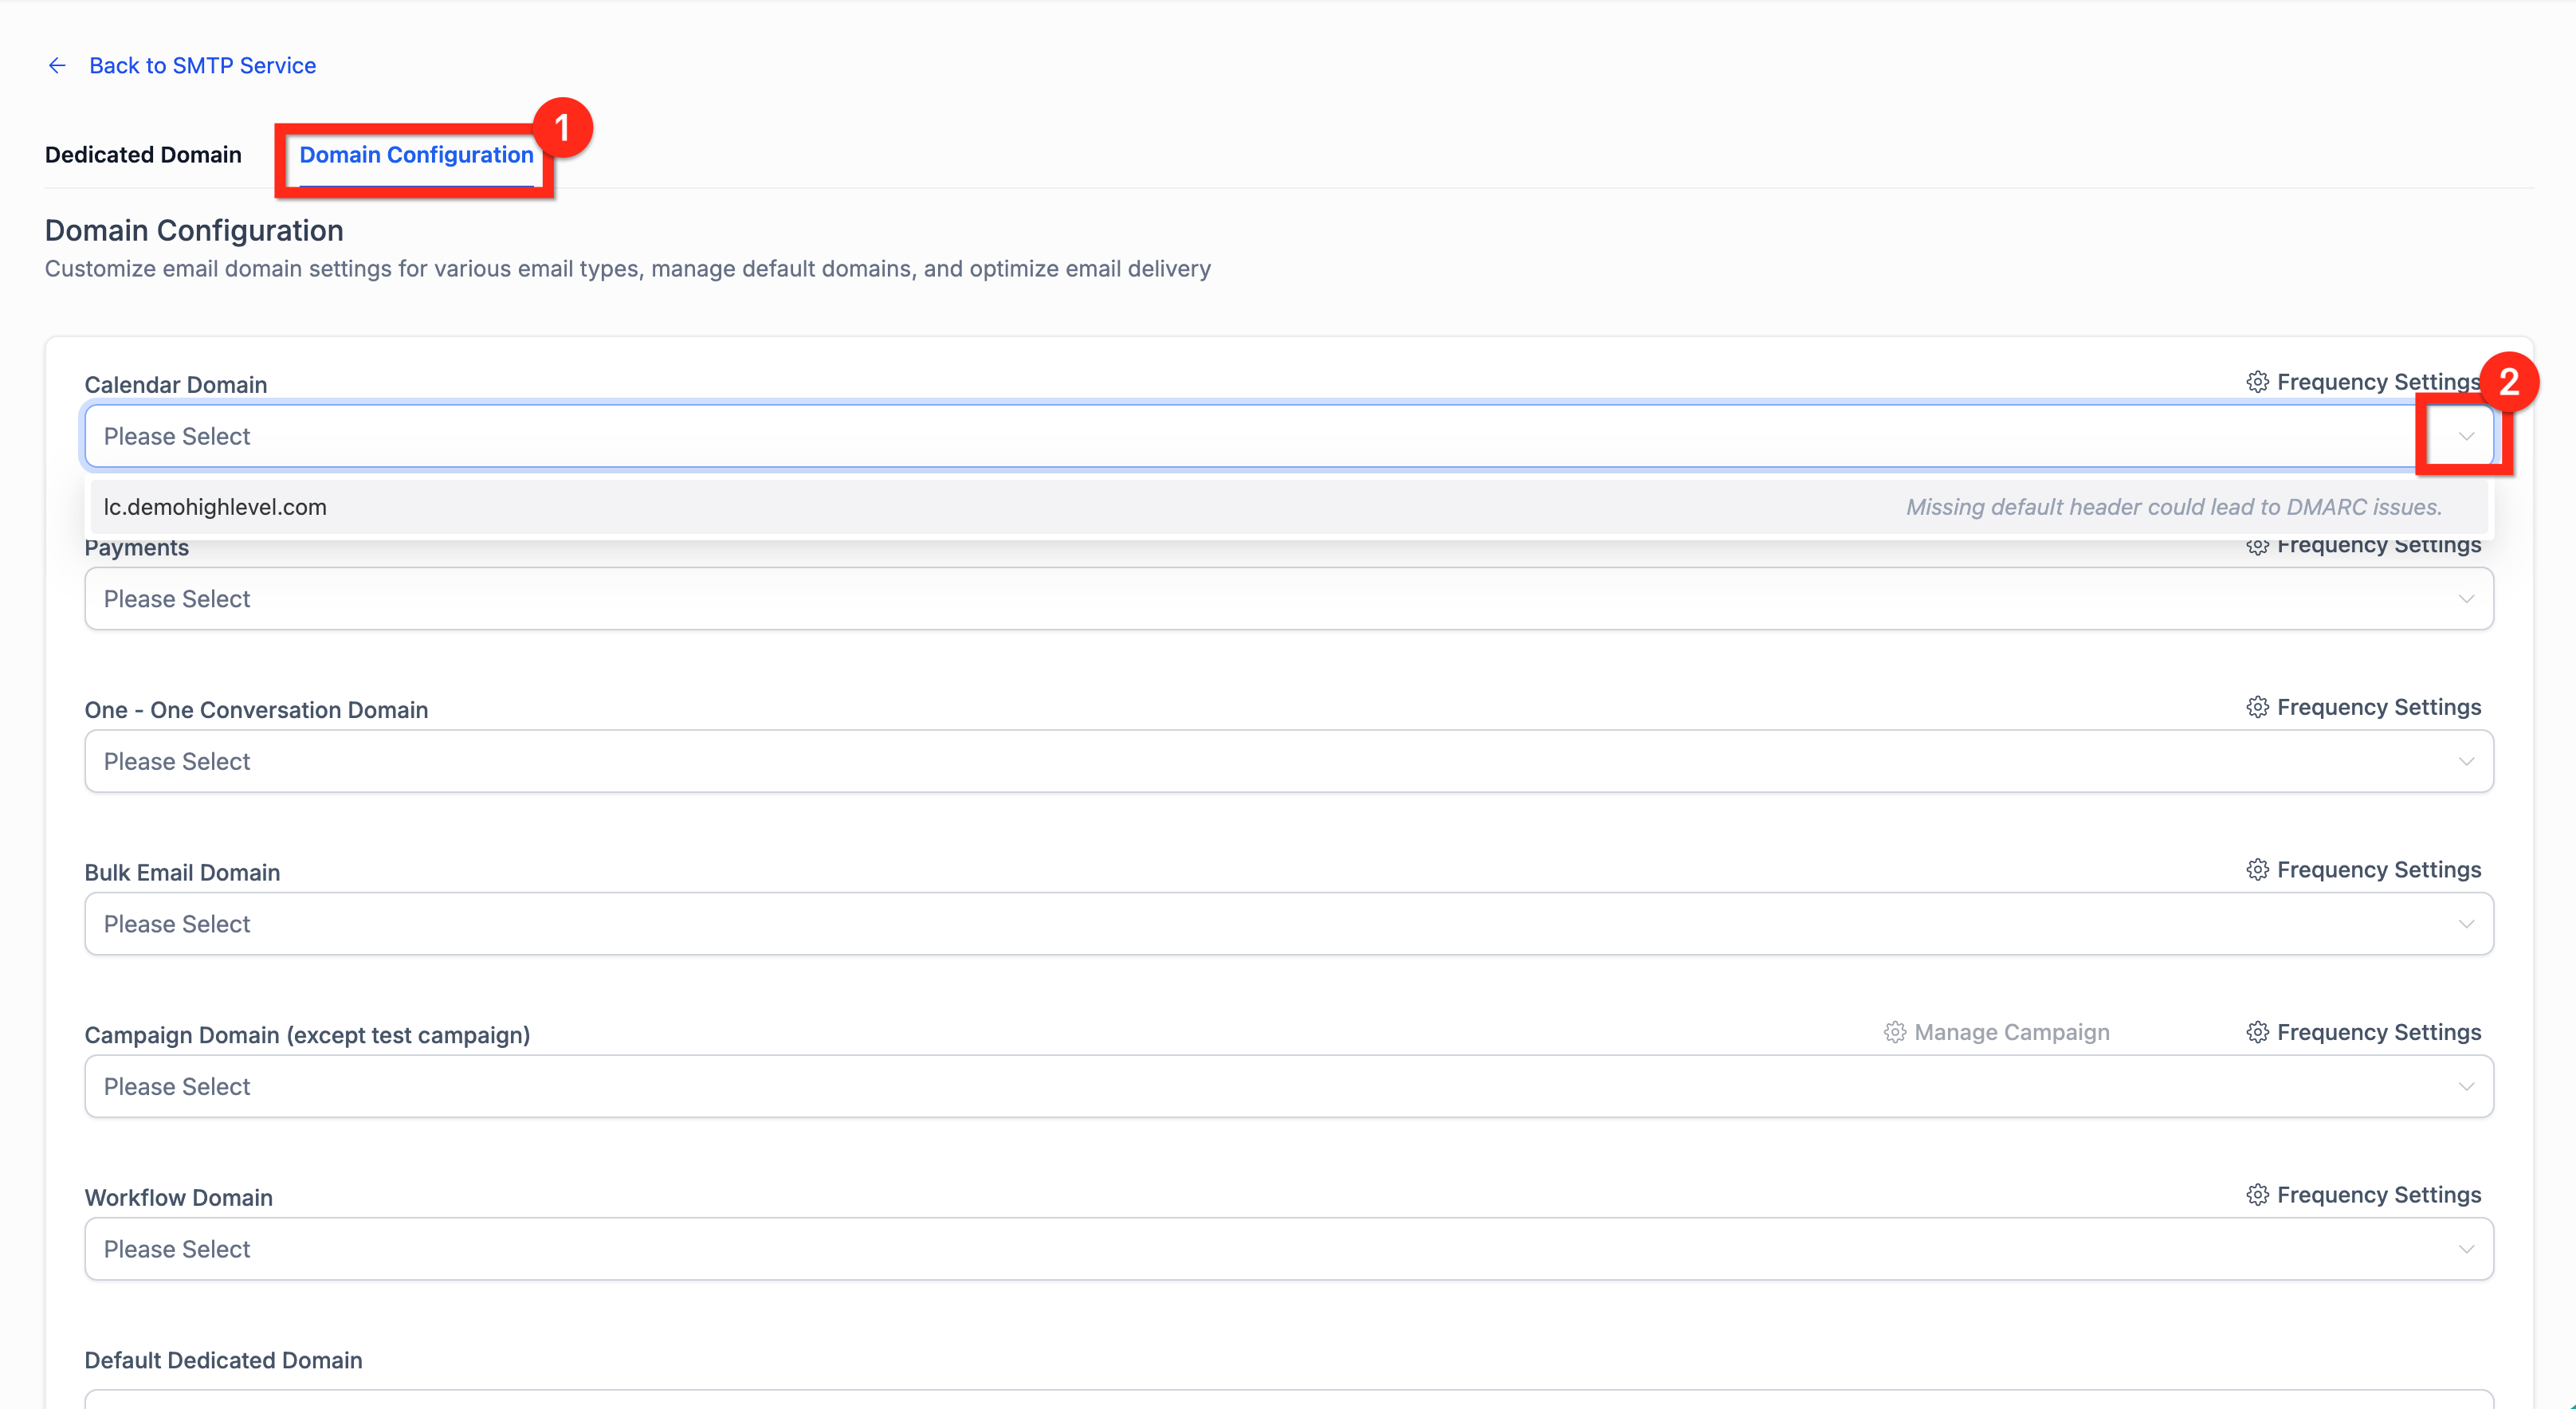
- Under Domain Configuration, find the Calendar category and use the dropdown to add your domains. You can add up to 5.
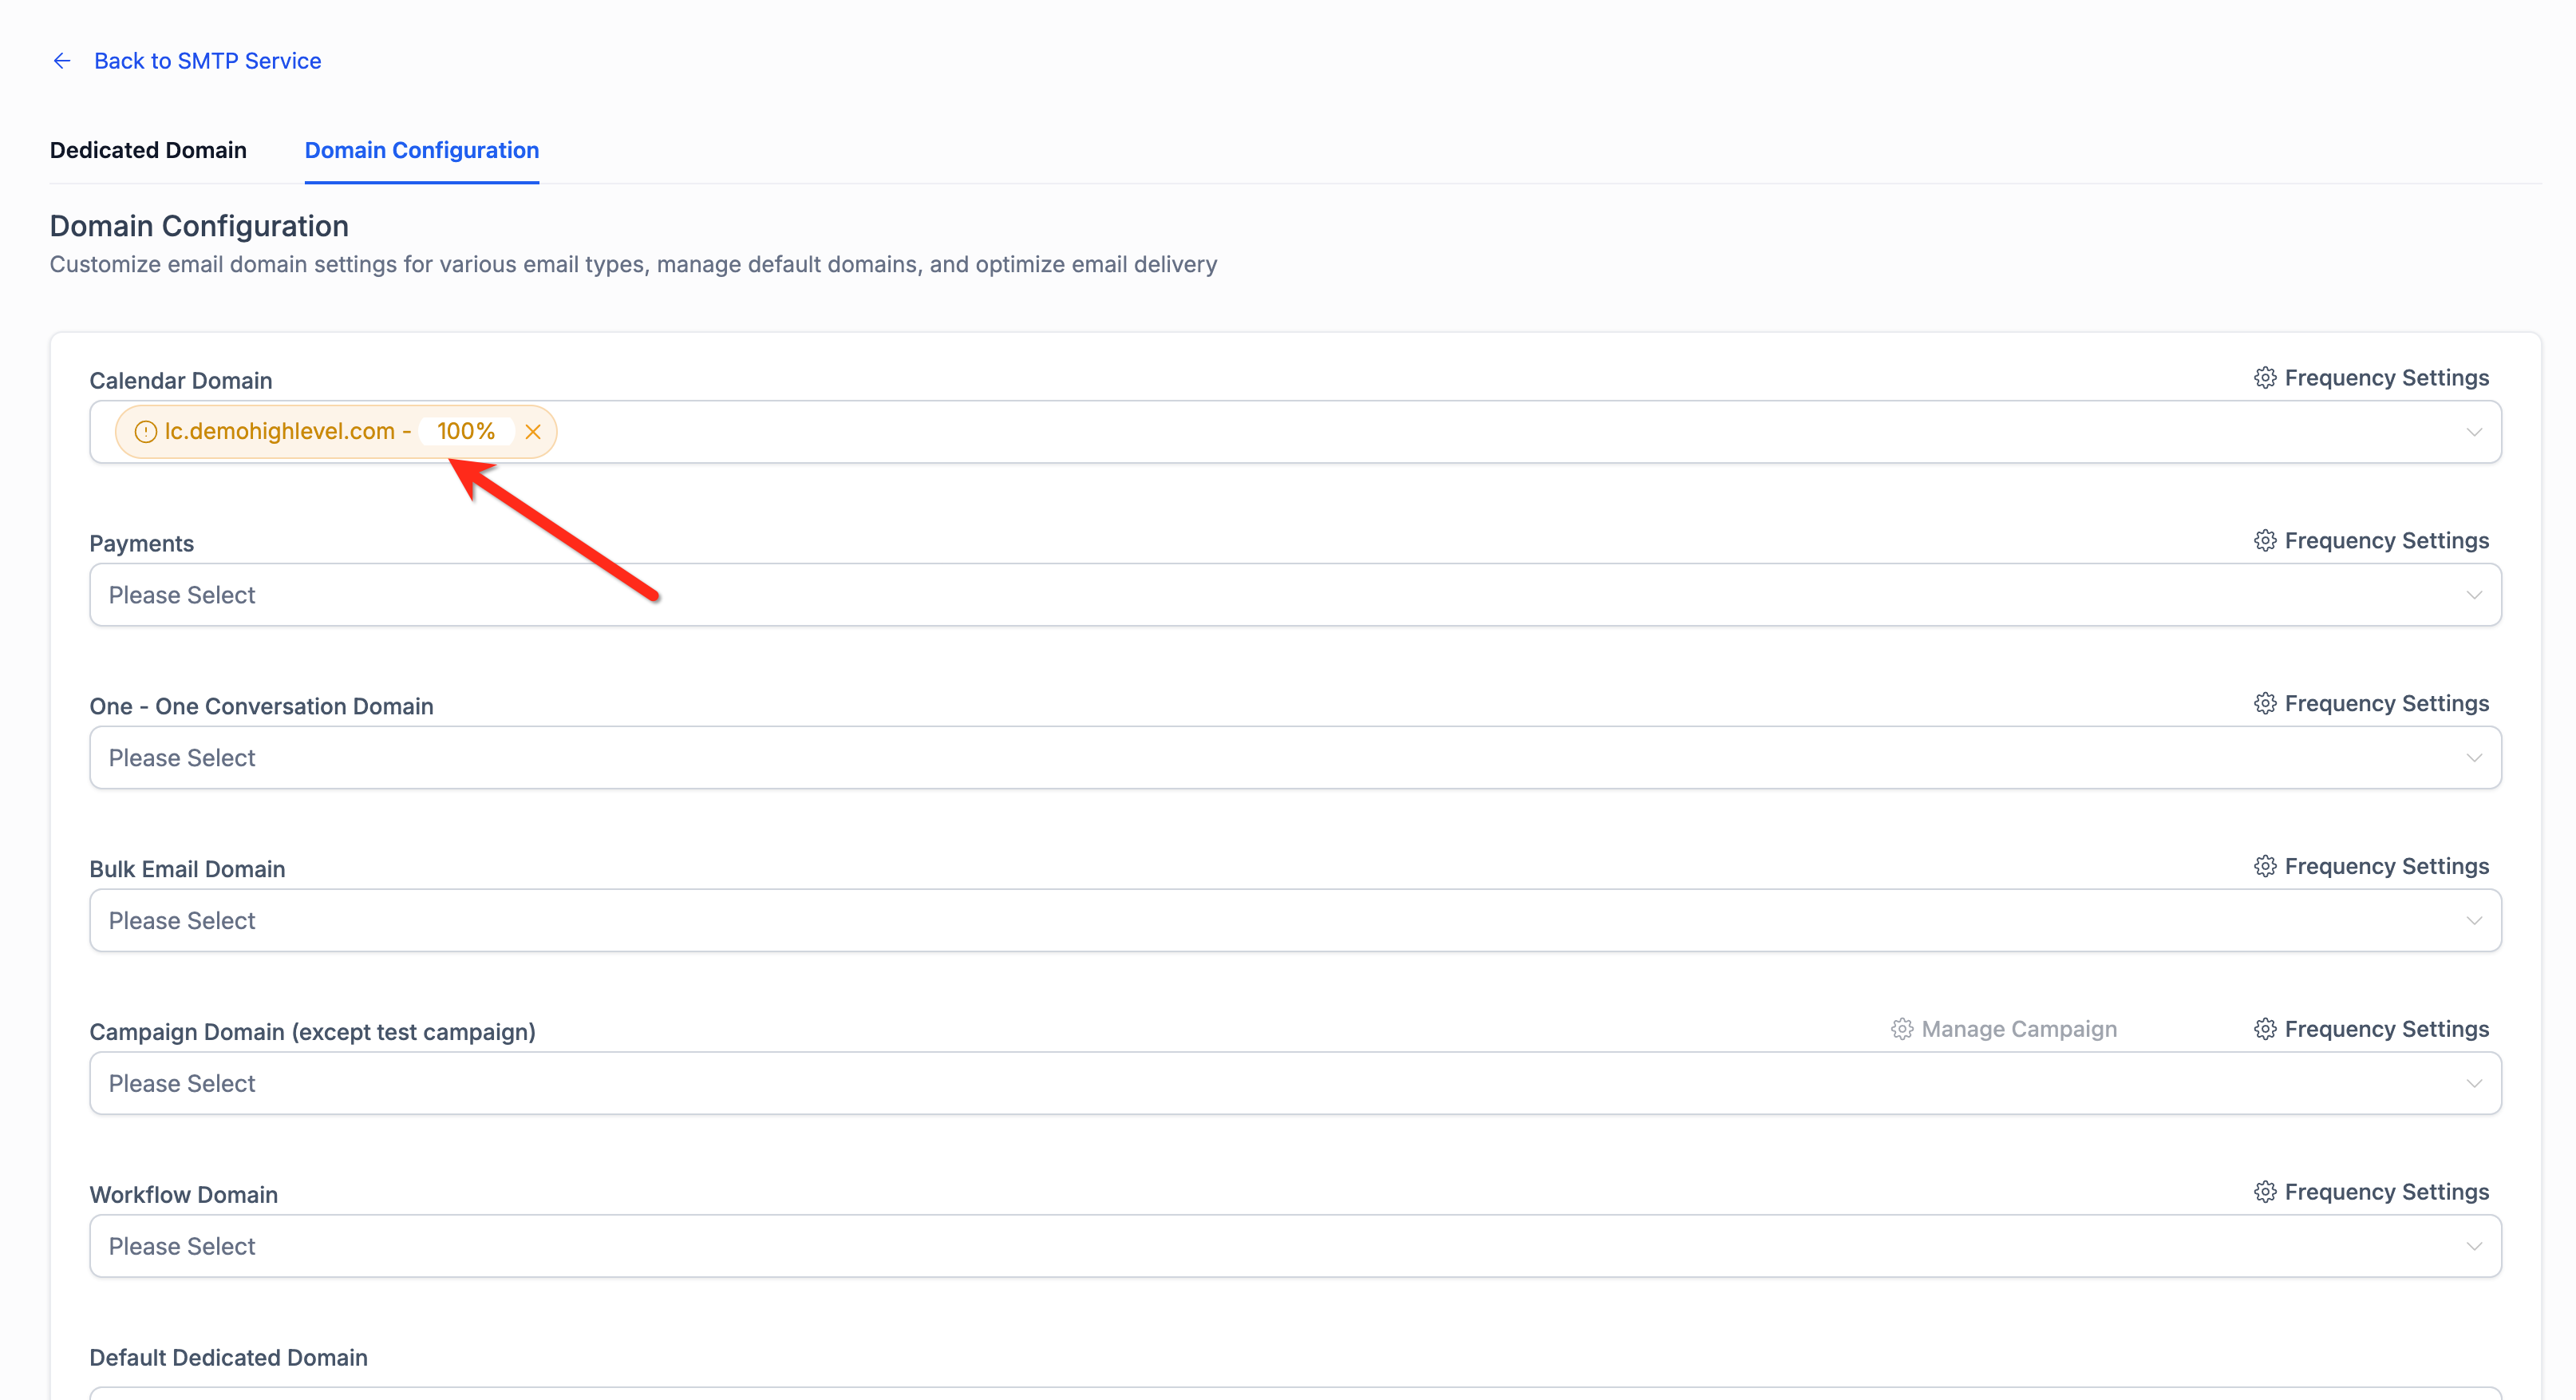
- If you added more than one Calendar domain, set the percentage of emails each domain should send.
Step 5 (Recommended): Set Up Google Postmaster Tools
Google Postmaster Tools lets you see how Gmail treats emails from your domain, including your domain reputation, spam rate, and delivery errors. It's a helpful way to spot inbox problems early.
- Sign in to Google Postmaster Tools with a Google account.
- Add your domain (for example, yourbrand.com or mail.yourbrand.com).
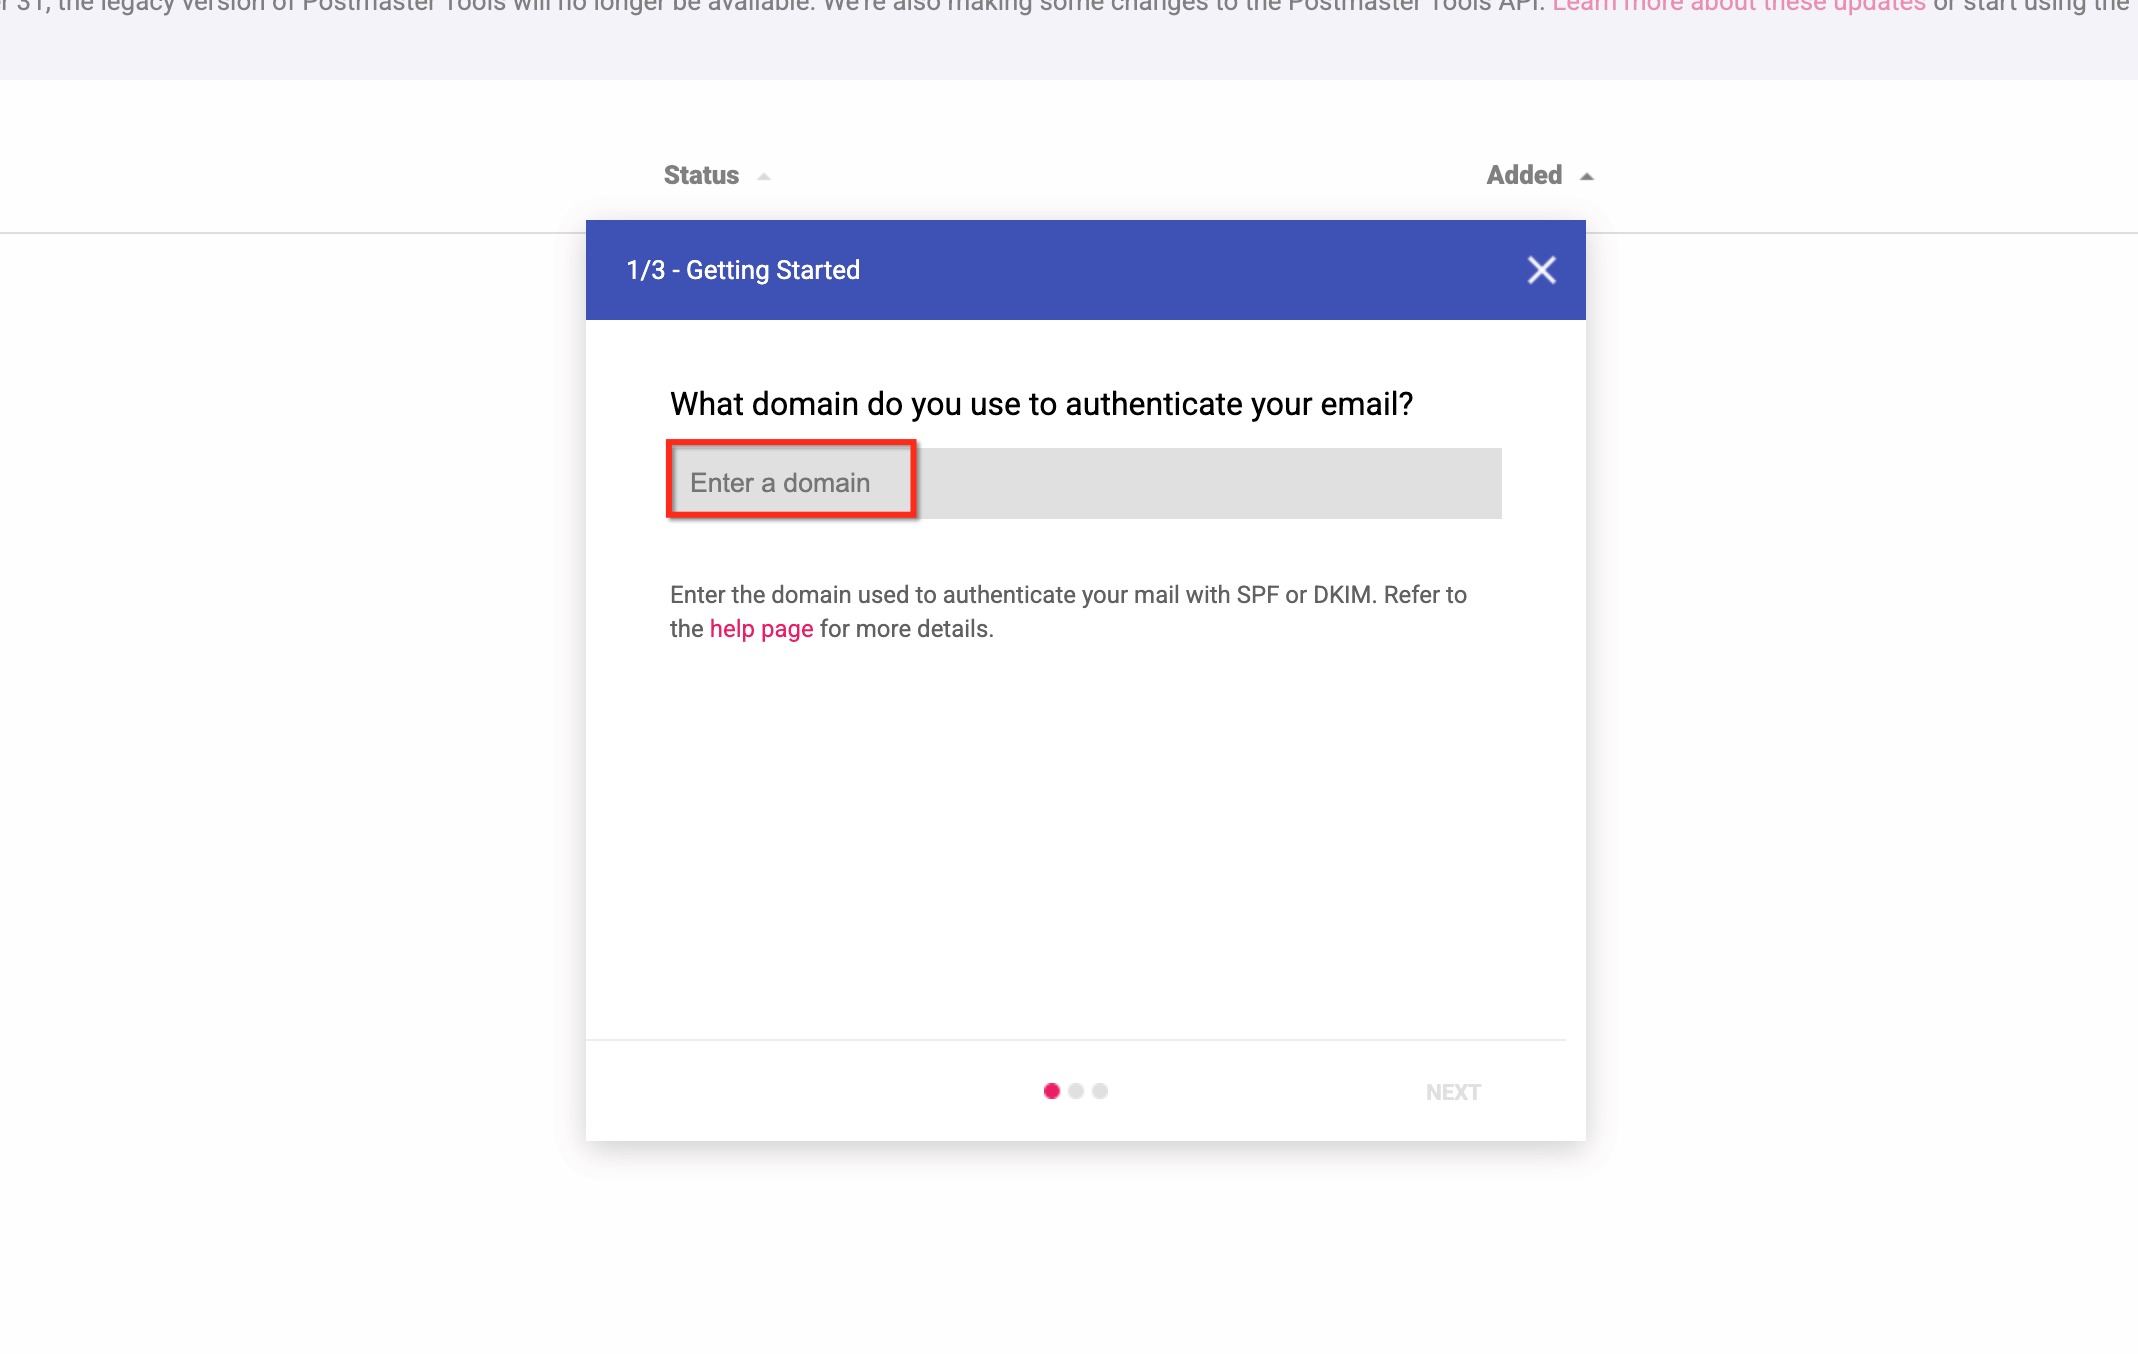
- Choose Verify and copy the TXT record Google gives you.
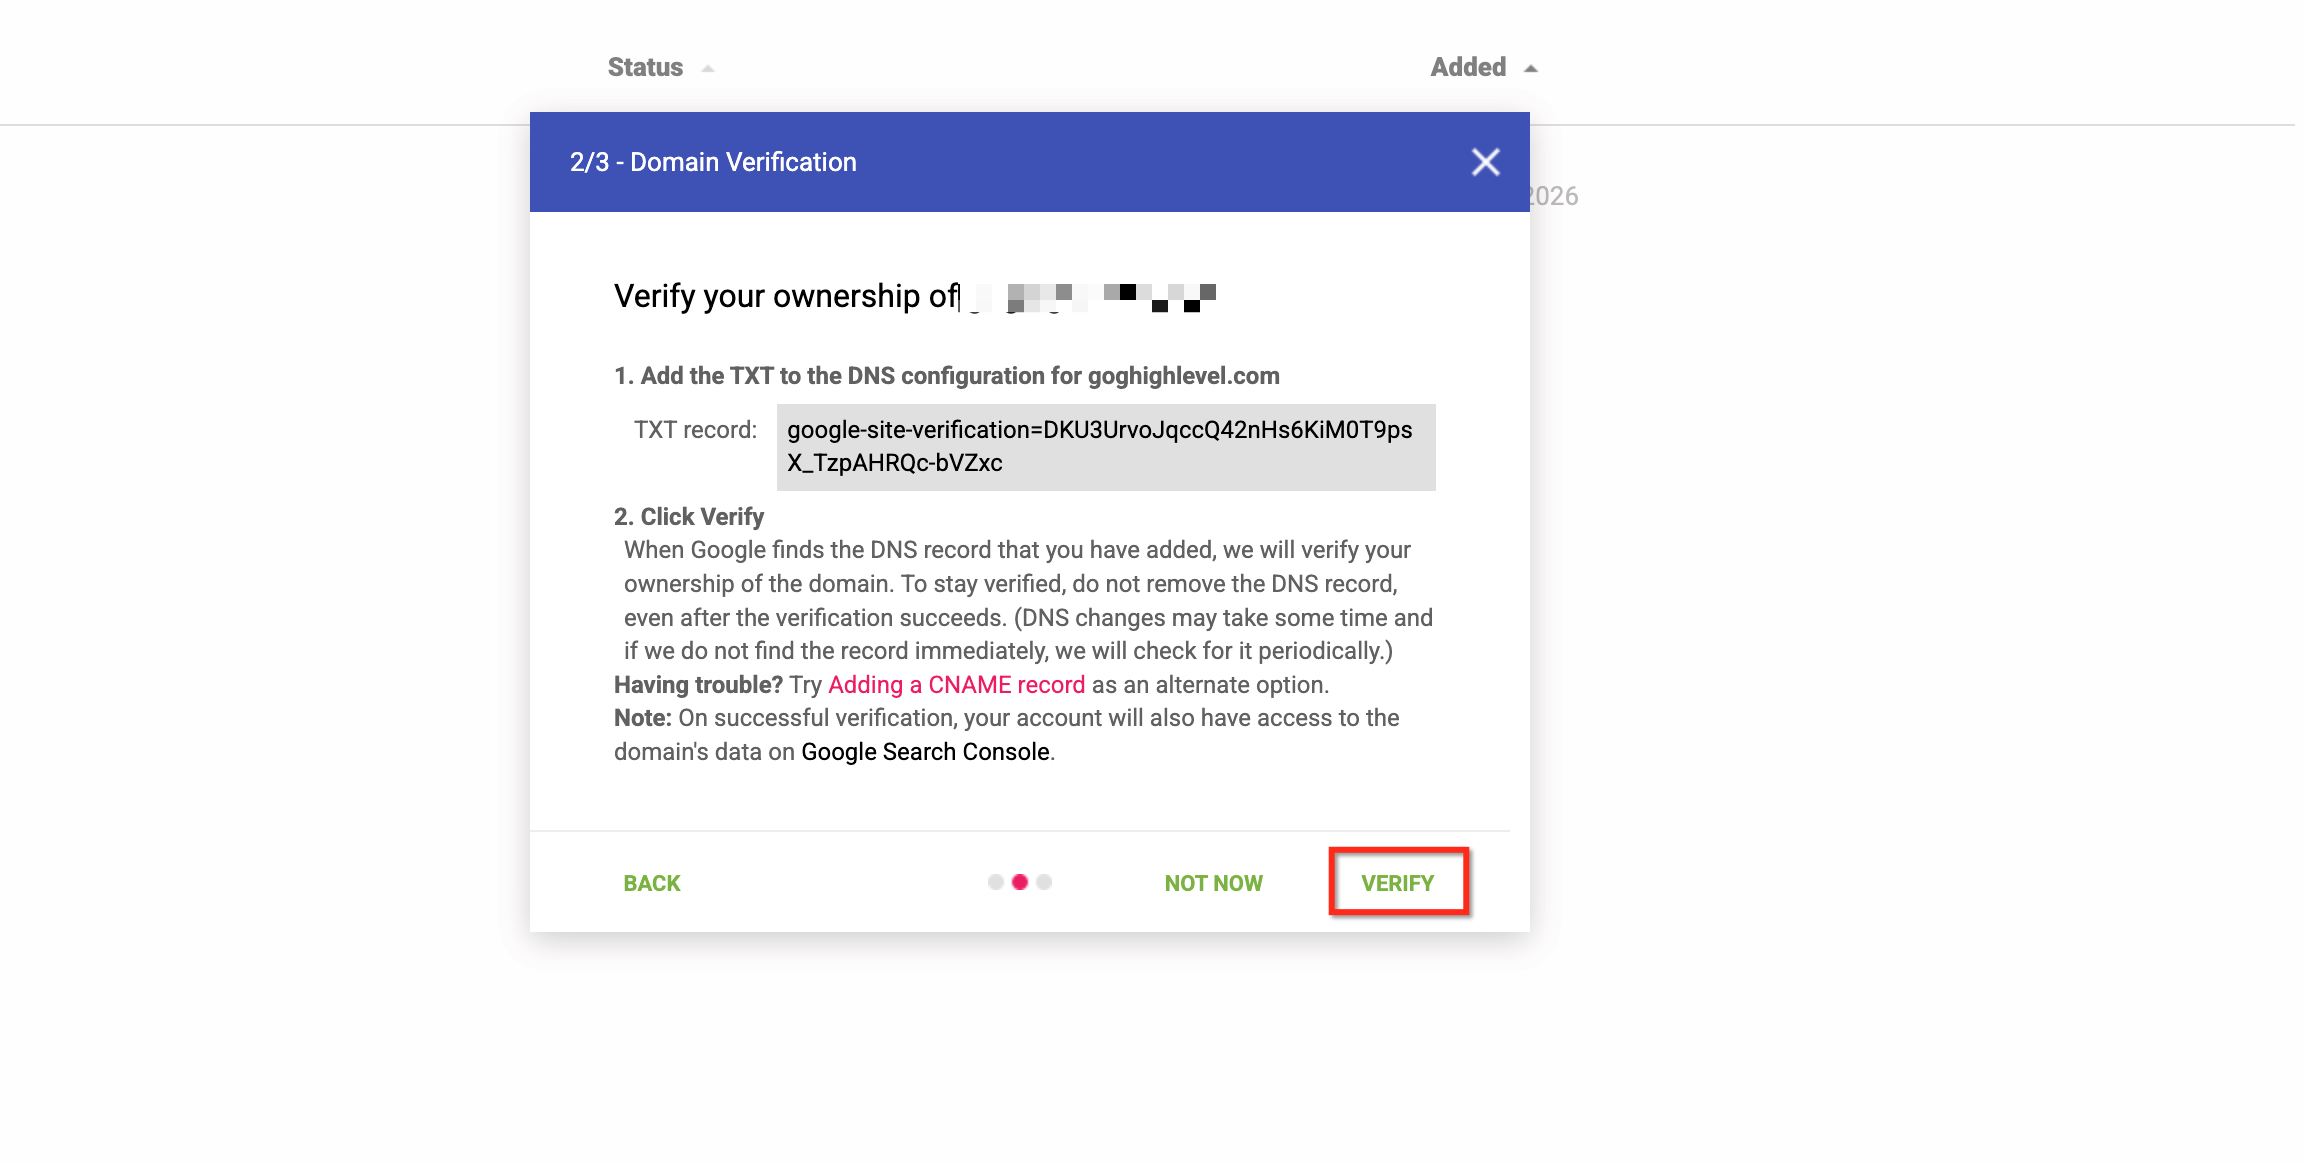
- Add that TXT record in your domain provider's DNS settings exactly as shown, then save.
- Go back to Google Postmaster Tools and finish verification. It may take a little while for Google to detect the record.
- Send emails from your verified domain. Once Google has enough email volume to measure, your reputation and delivery dashboards will start filling in.
What Happens If You Don't Use a Dedicated Domain?
If you send from the shared domain, Captivation Hub keeps the From address you set up but adjusts the actual sending address behind the scenes so it matches the shared servers. For example:
- Your From address: support@yourbrand.com
- What recipients may see as the sending address: support+yourbrand.com@mg.msgsndr.com
Your reply-to address is not affected. Replies still go exactly where you set them to go. To have your emails send exactly as you set them up, with no adjustments, use a dedicated sending domain.
Troubleshooting
Error: "Domain already pointing to email server!"
This means your domain already has email records connected to another service. Remove any existing MX or SPF records for that subdomain (including older Captivation Hub records), then try again. You can check your current records with a free lookup tool such as MXToolbox.
Error: "Pre-existing record"
This usually means your domain has a wildcard DNS record (for example, *.yourbrand.com), which makes every subdomain look like it already exists. Either remove the wildcard record temporarily, verify your sending domain, and then add it back, or add the DNS records for your subdomain manually so they override the wildcard.
Frequently Asked Questions
Should I use my root domain or a subdomain?
We recommend a subdomain, such as mg.yourbrand.com. It protects the reputation of your main domain. Your reply-to address can still be your main business email so replies land in your regular inbox.
What's the difference between the sending address and the reply-to address?
The sending (From) address is what your emails are sent from, and it needs to be verified through your dedicated sending domain. The reply-to address is where replies go. It can be any email address you choose and doesn't need to be verified.
Some of my DNS records still aren't verified. What should I do?
Try running the verification again manually. If the records still won't verify, reach out to your domain provider, since the issue is usually on their end.
How do I get an SSL certificate for my sending domain?
It's created automatically once your domain is verified. If your domain shows as verified but there's no SSL certificate, go through the verification process again. If that doesn't fix it, contact your domain provider.
Can I set up a dedicated IP address too?
Yes, but that's a separate setup from a dedicated sending domain. Reach out to our support team if you'd like help with a dedicated IP.
Comments
0 comments
Please sign in to leave a comment.