
Email marketing is a great way to reach customers and increase sales — but to get it right, your messages need to land in the inbox, not the spam folder. A dedicated sending domain gives you full control over what appears to be coming from your business, helping you avoid spam filters and maintain a strong sender reputation.
Don't let your email marketing efforts go unnoticed! Get started right away with a dedicated sending domain.
IMPORTANT: If you are using a new domain that has never been used for email, make sure to warm up your domain before emailing a large list. Skipping this step will result in poor deliverability.
What is a Dedicated Sending Domain?
A dedicated sending domain lets you send emails that appear to come directly from your brand, helping you maintain a stronger sender reputation with email providers. Any sub-account or agency can create a dedicated sending domain — and it's quick and easy to set up.
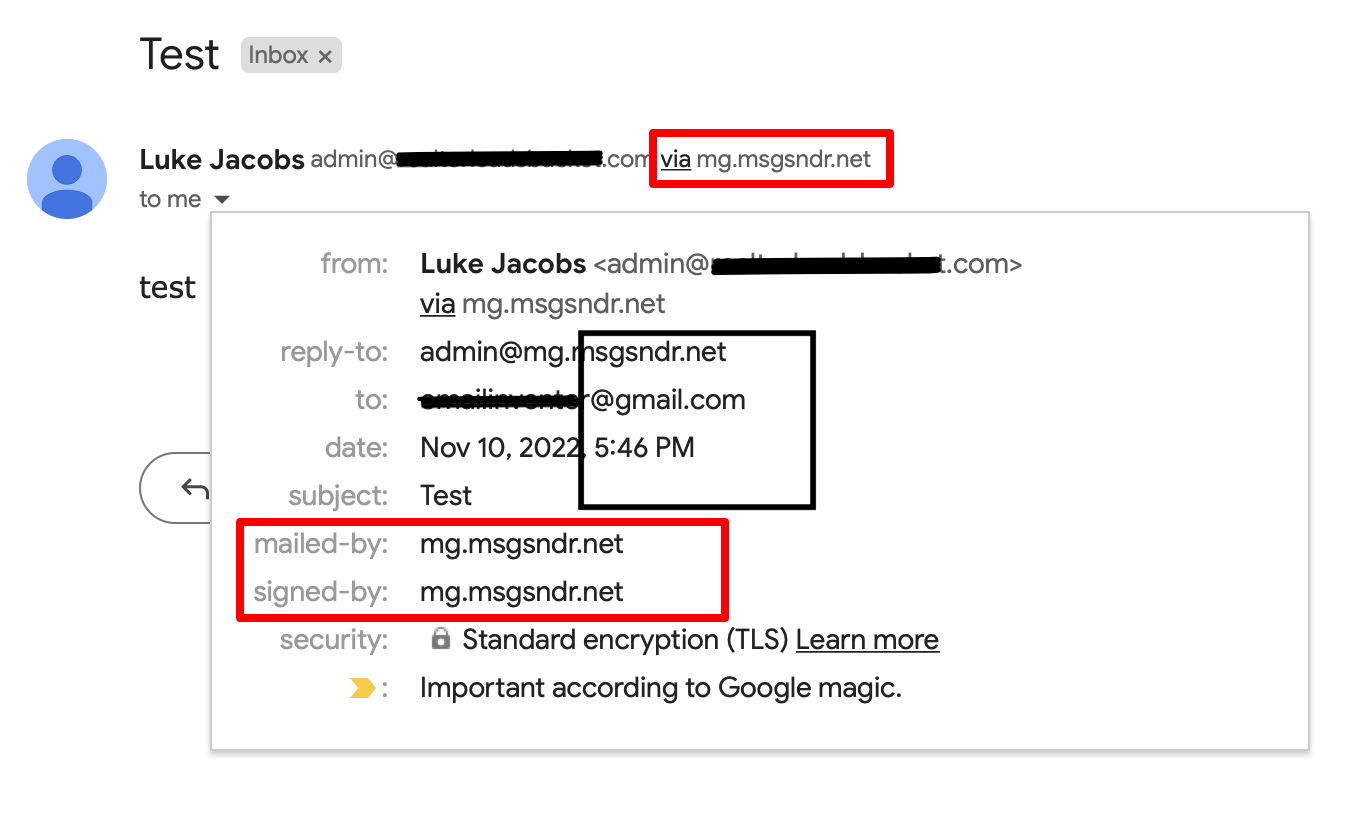
By default, all emails sent from the platform will show the name of the email-sending servers in the "sent on behalf of" or "sent via" email headers:
Configuring Dedicated Sending Domains
You can create multiple sending domains under your account and use different domains for different email-sending actions — such as 1-to-1 emails, workflow emails, marketing campaign emails, and Payment and Invoice emails.
Step 1: Navigate to Email Services
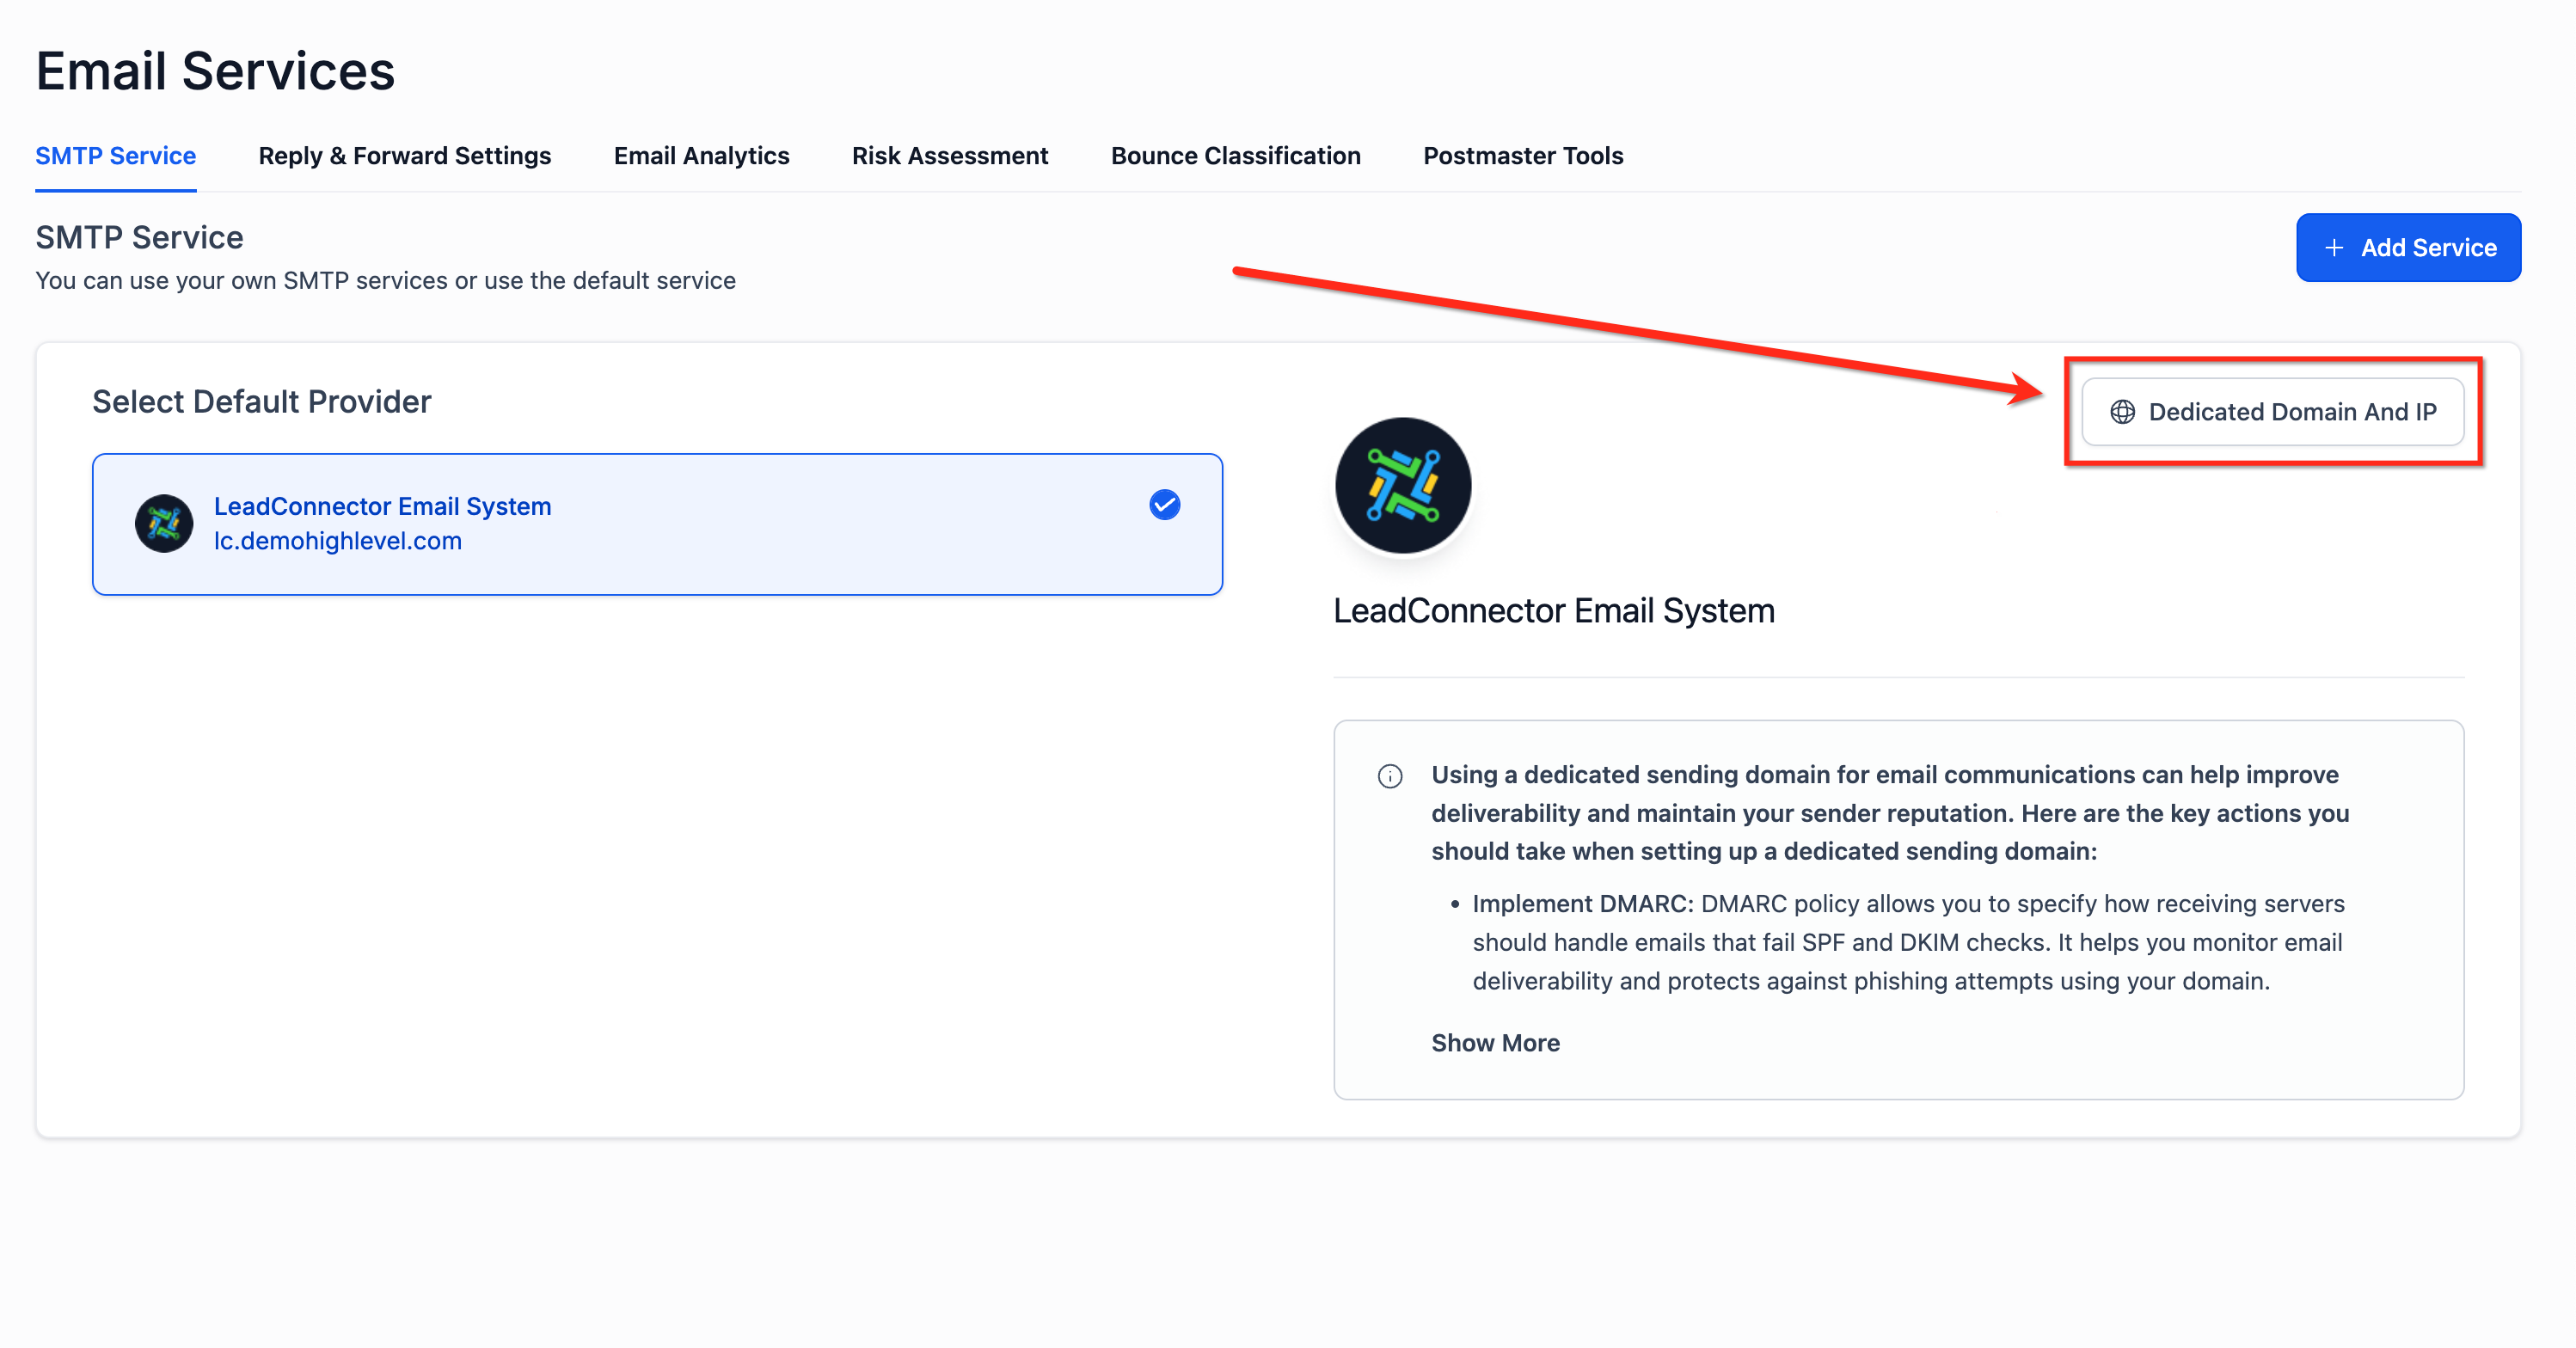
Navigate to Settings > Email Services.
Click the Dedicated Domain and IP button.

Step 2: Add Domain Information
Click the Add Domain button to begin configuring your sending domain. Enter the sub-domain you want to use for your dedicated sending domain.

What is a Sub-Domain?
Sub-domains are variants of your root domain. For example, if your root domain is agency123.com, you can create sub-domains like emails.agency123.com or no-reply.agency123.com and use these in different campaigns or communication channels. You can create as many sub-domains as you like by adding a unique word in front of your root domain and configuring the DNS records in your hosting provider settings.
Step 3: Verify DNS Records
Once you've added your sub-domain, you will need to verify your DNS records. You can allow the platform to auto-configure your DNS records, or enter them manually. If auto-configuration is unavailable, you will need to add them manually.

REMEMBER: The DNS propagation process can take up to 24 hours. If it has been longer than 24 hours, double-check your DNS settings. NOTE: Multiple DKIM records for a single domain are not supported.
Step 4: Dedicated Sending Domains for Calendar Emails (Sub-Accounts)
Use Calendar dedicated sending domains for appointment-related emails such as confirmations, reminders, and reschedules. This helps separate appointment traffic from other email types and supports deliverability for time-sensitive communications.
Manually Adding DNS Records
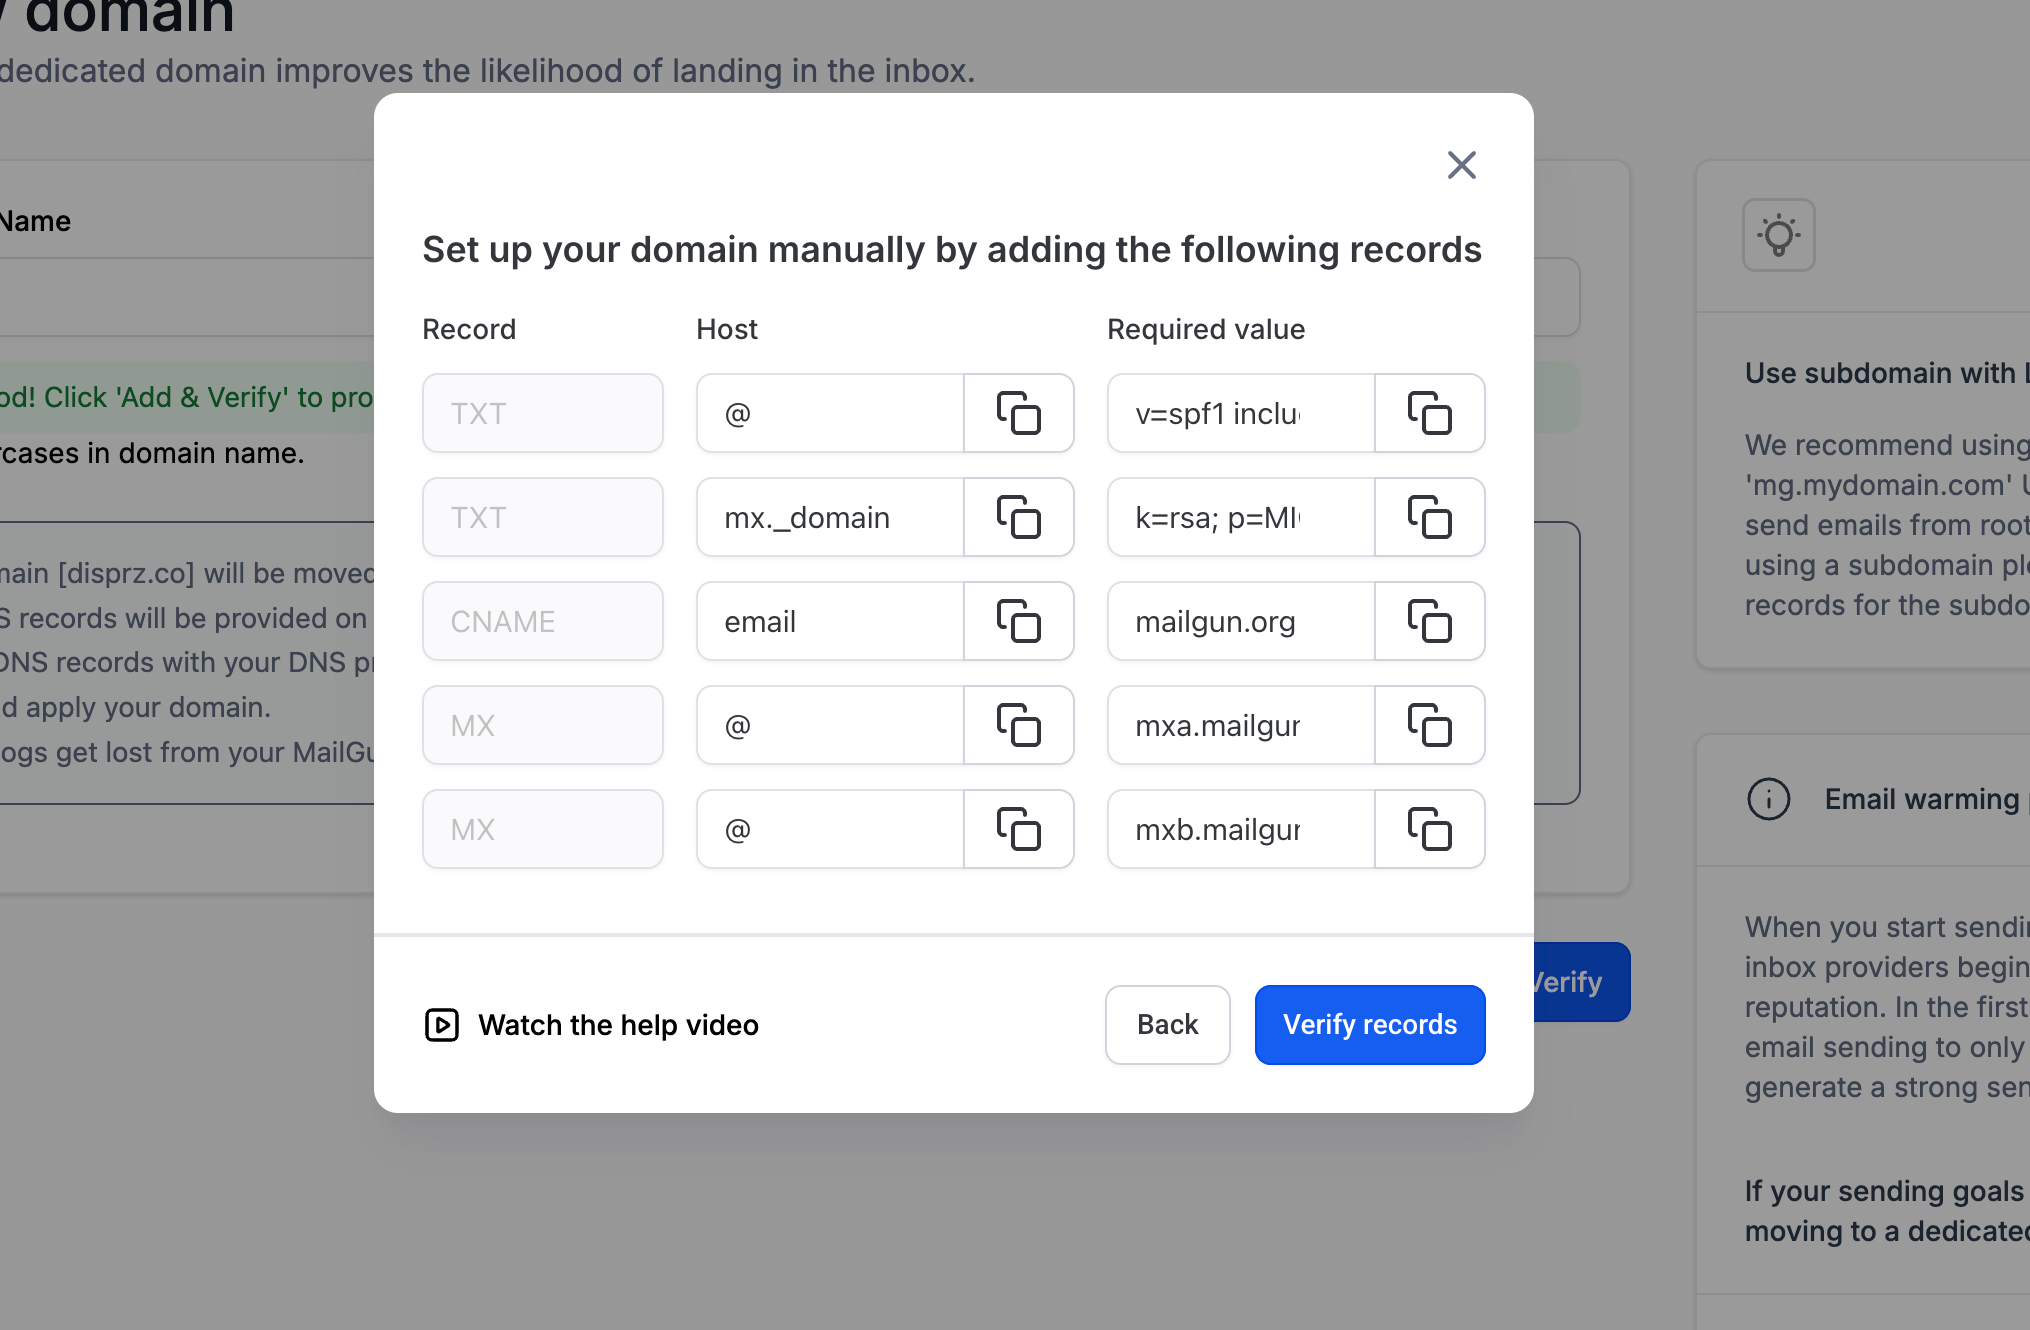
To add your DNS records manually, create them in your hosting provider's dashboard where you manage your domains. You will be given specific DNS record details to enter, as shown in the screenshot below.

Dedicated Sending Domains for Calendar Emails (Sub-Accounts)
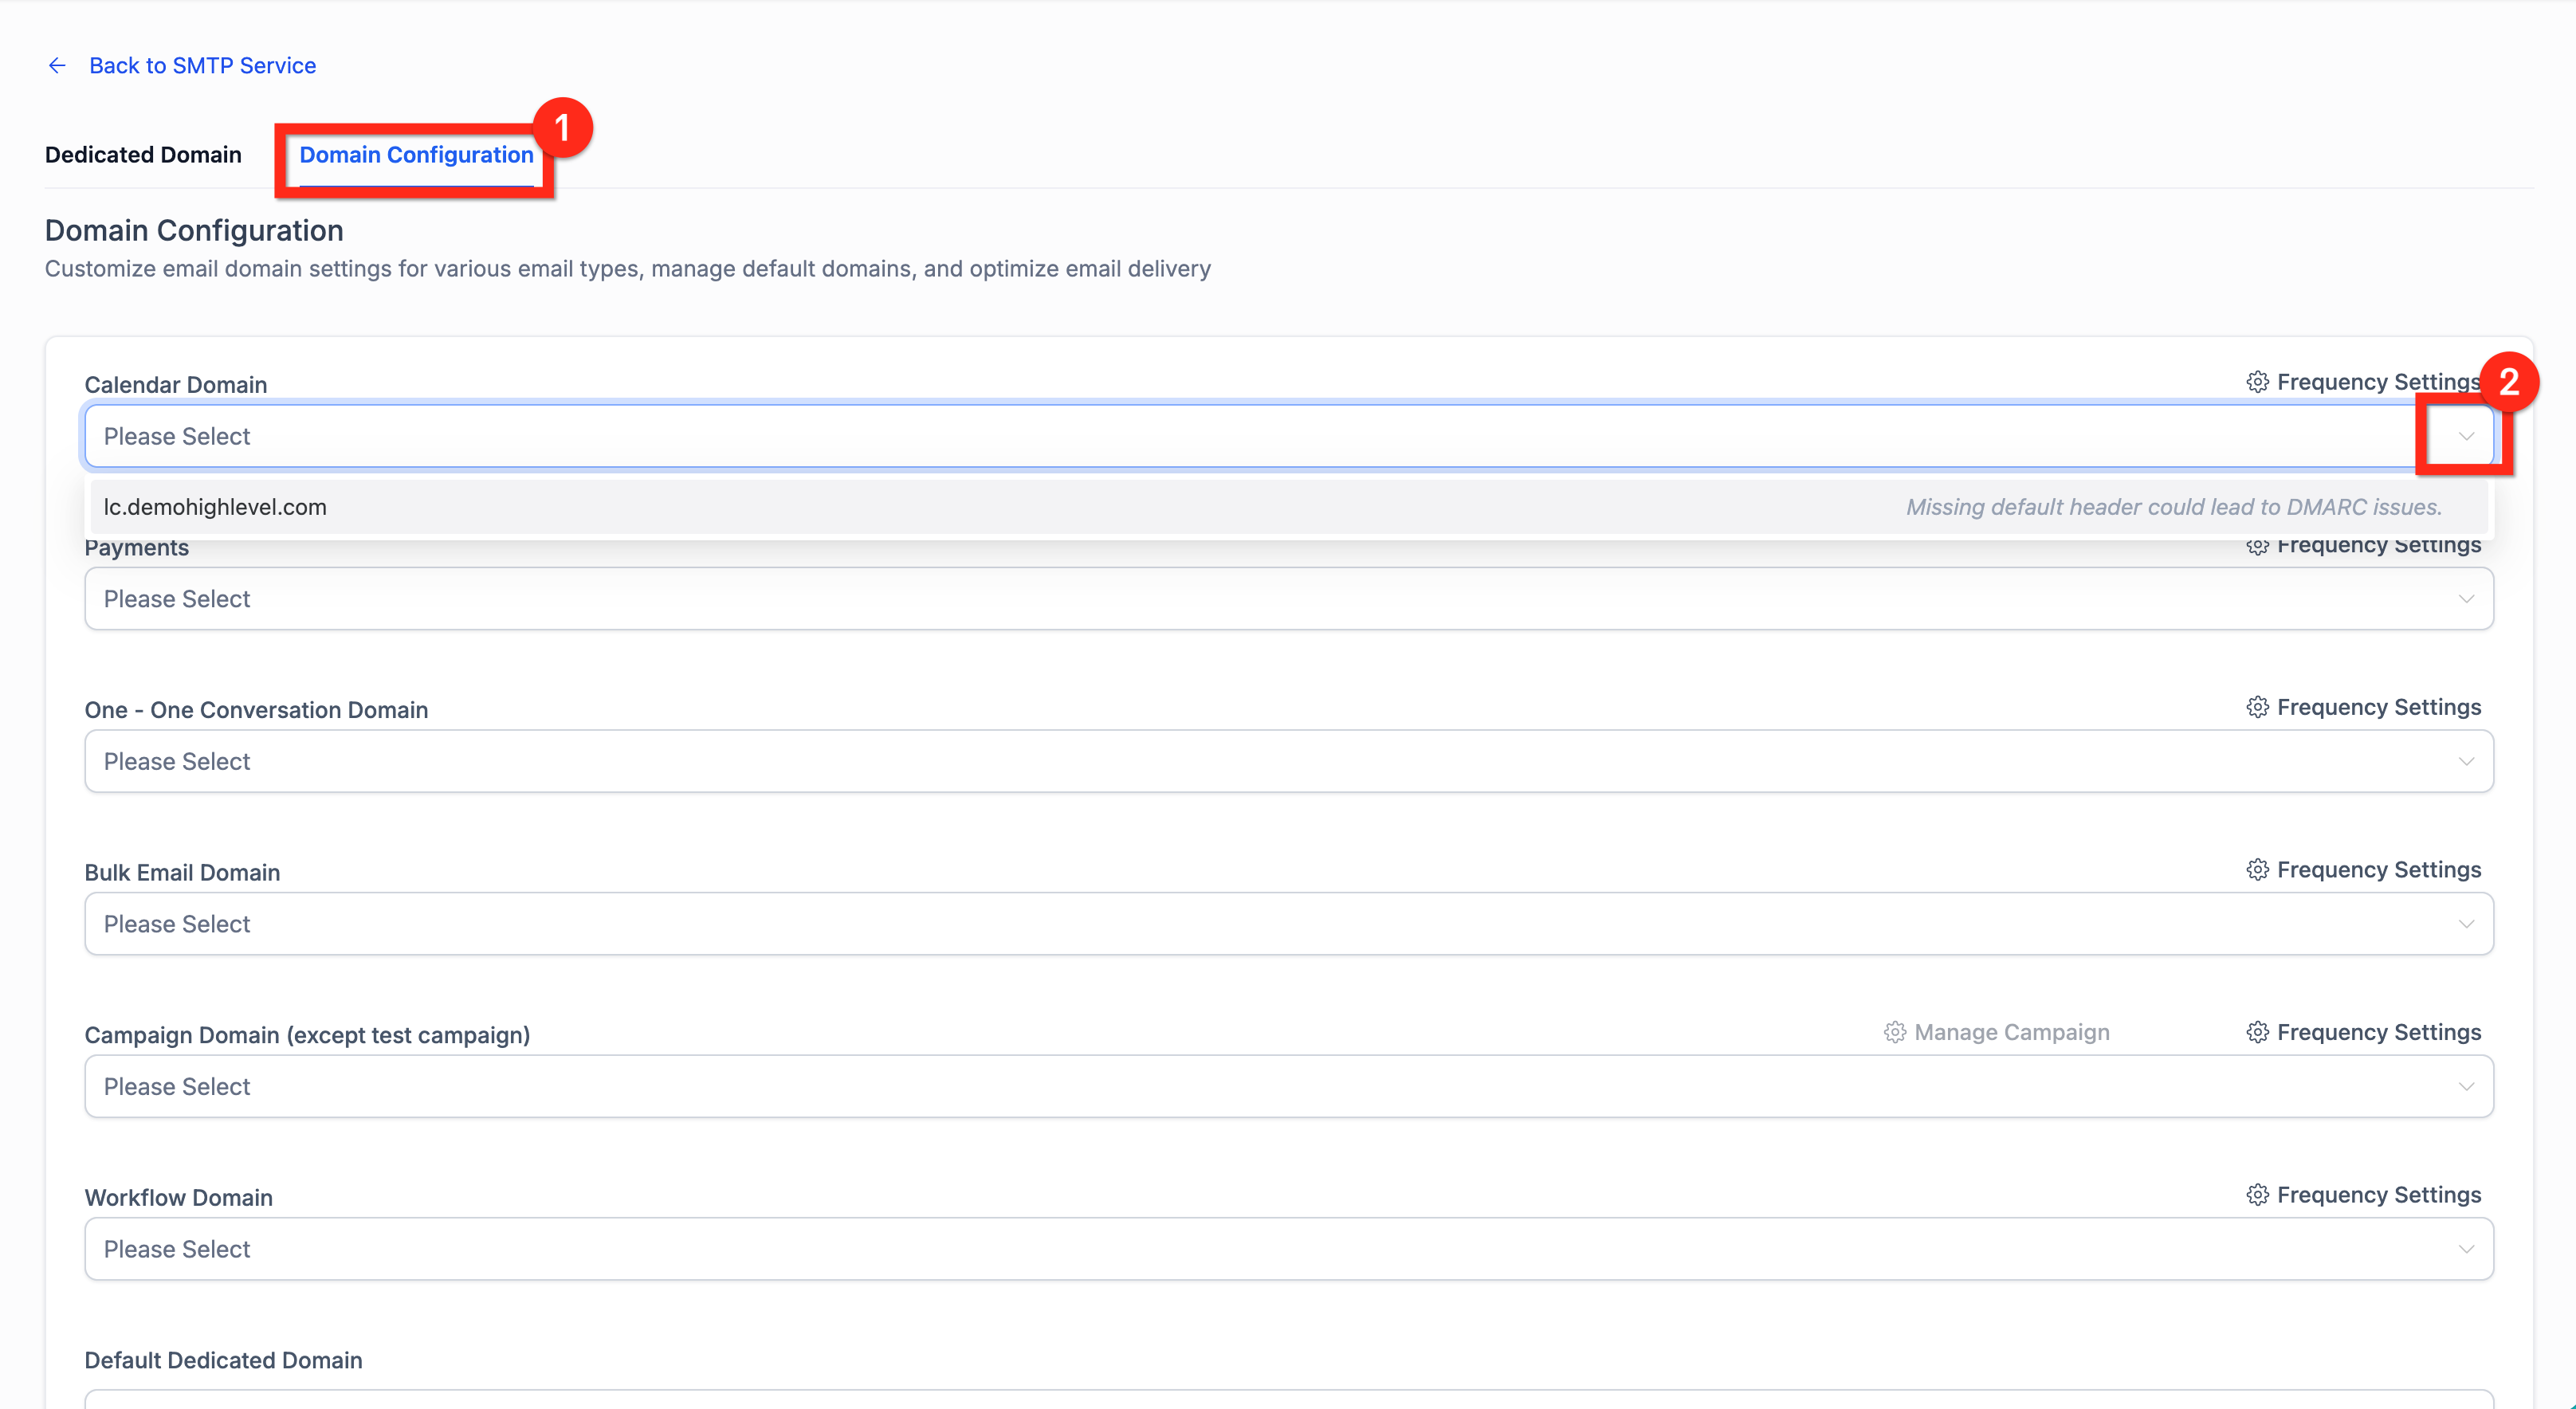
You can assign dedicated sending domains specifically for Calendar emails to protect deliverability for appointment communications.
- Select Settings → Email Service → SMTP Service → proceed to step 2.
- Select Dedicated Domain and IP → proceed to step 3.
- Select Domain Configuration: In the Calendar category, use the dropdown to add your domains (up to 5 domains).
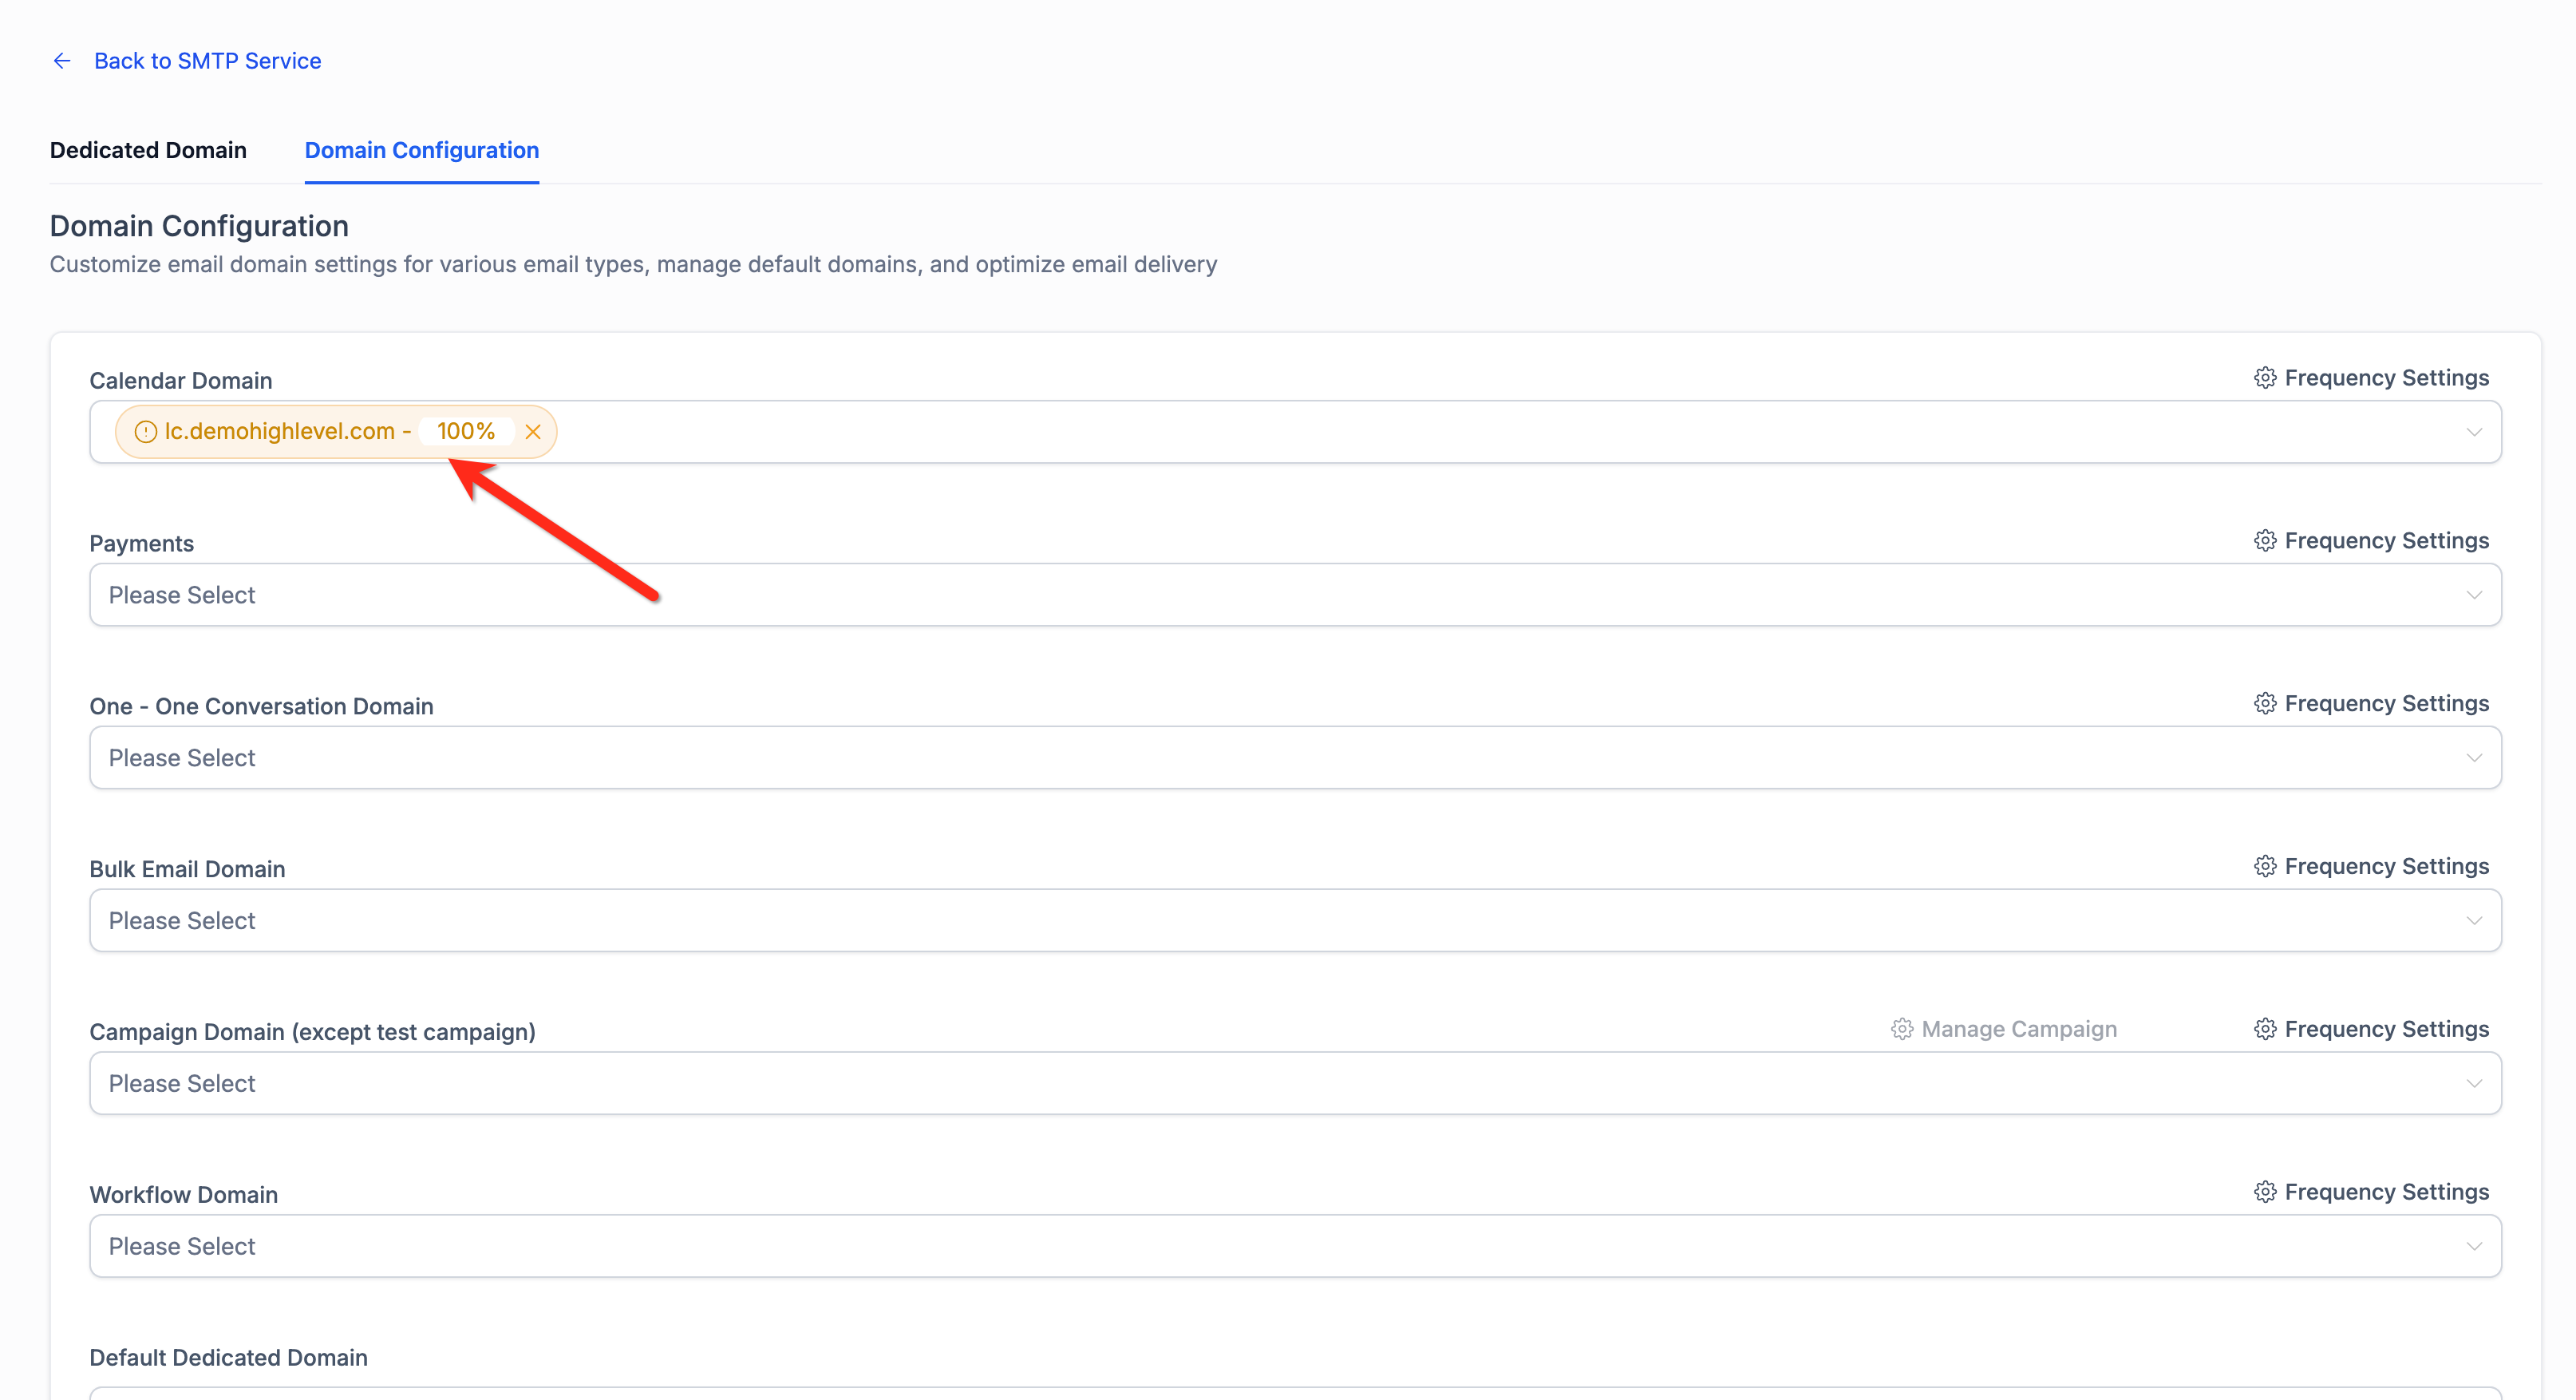
- Once a Calendar Domain is selected, set the percentage-based distribution across your Calendar domains (applicable when using multiple domains).
Set Up Google Postmaster Tools for Your Dedicated Domain
Google Postmaster Tools (GPT) helps you monitor Gmail-specific deliverability for your dedicated sending domain. By verifying your domain in GPT, you can track domain/IP reputation, spam rates, authentication alignment, and delivery errors — making it easier to diagnose inbox issues and improve performance over time.
Step-by-step:
- Sign in to Google Postmaster Tools with a Google account.
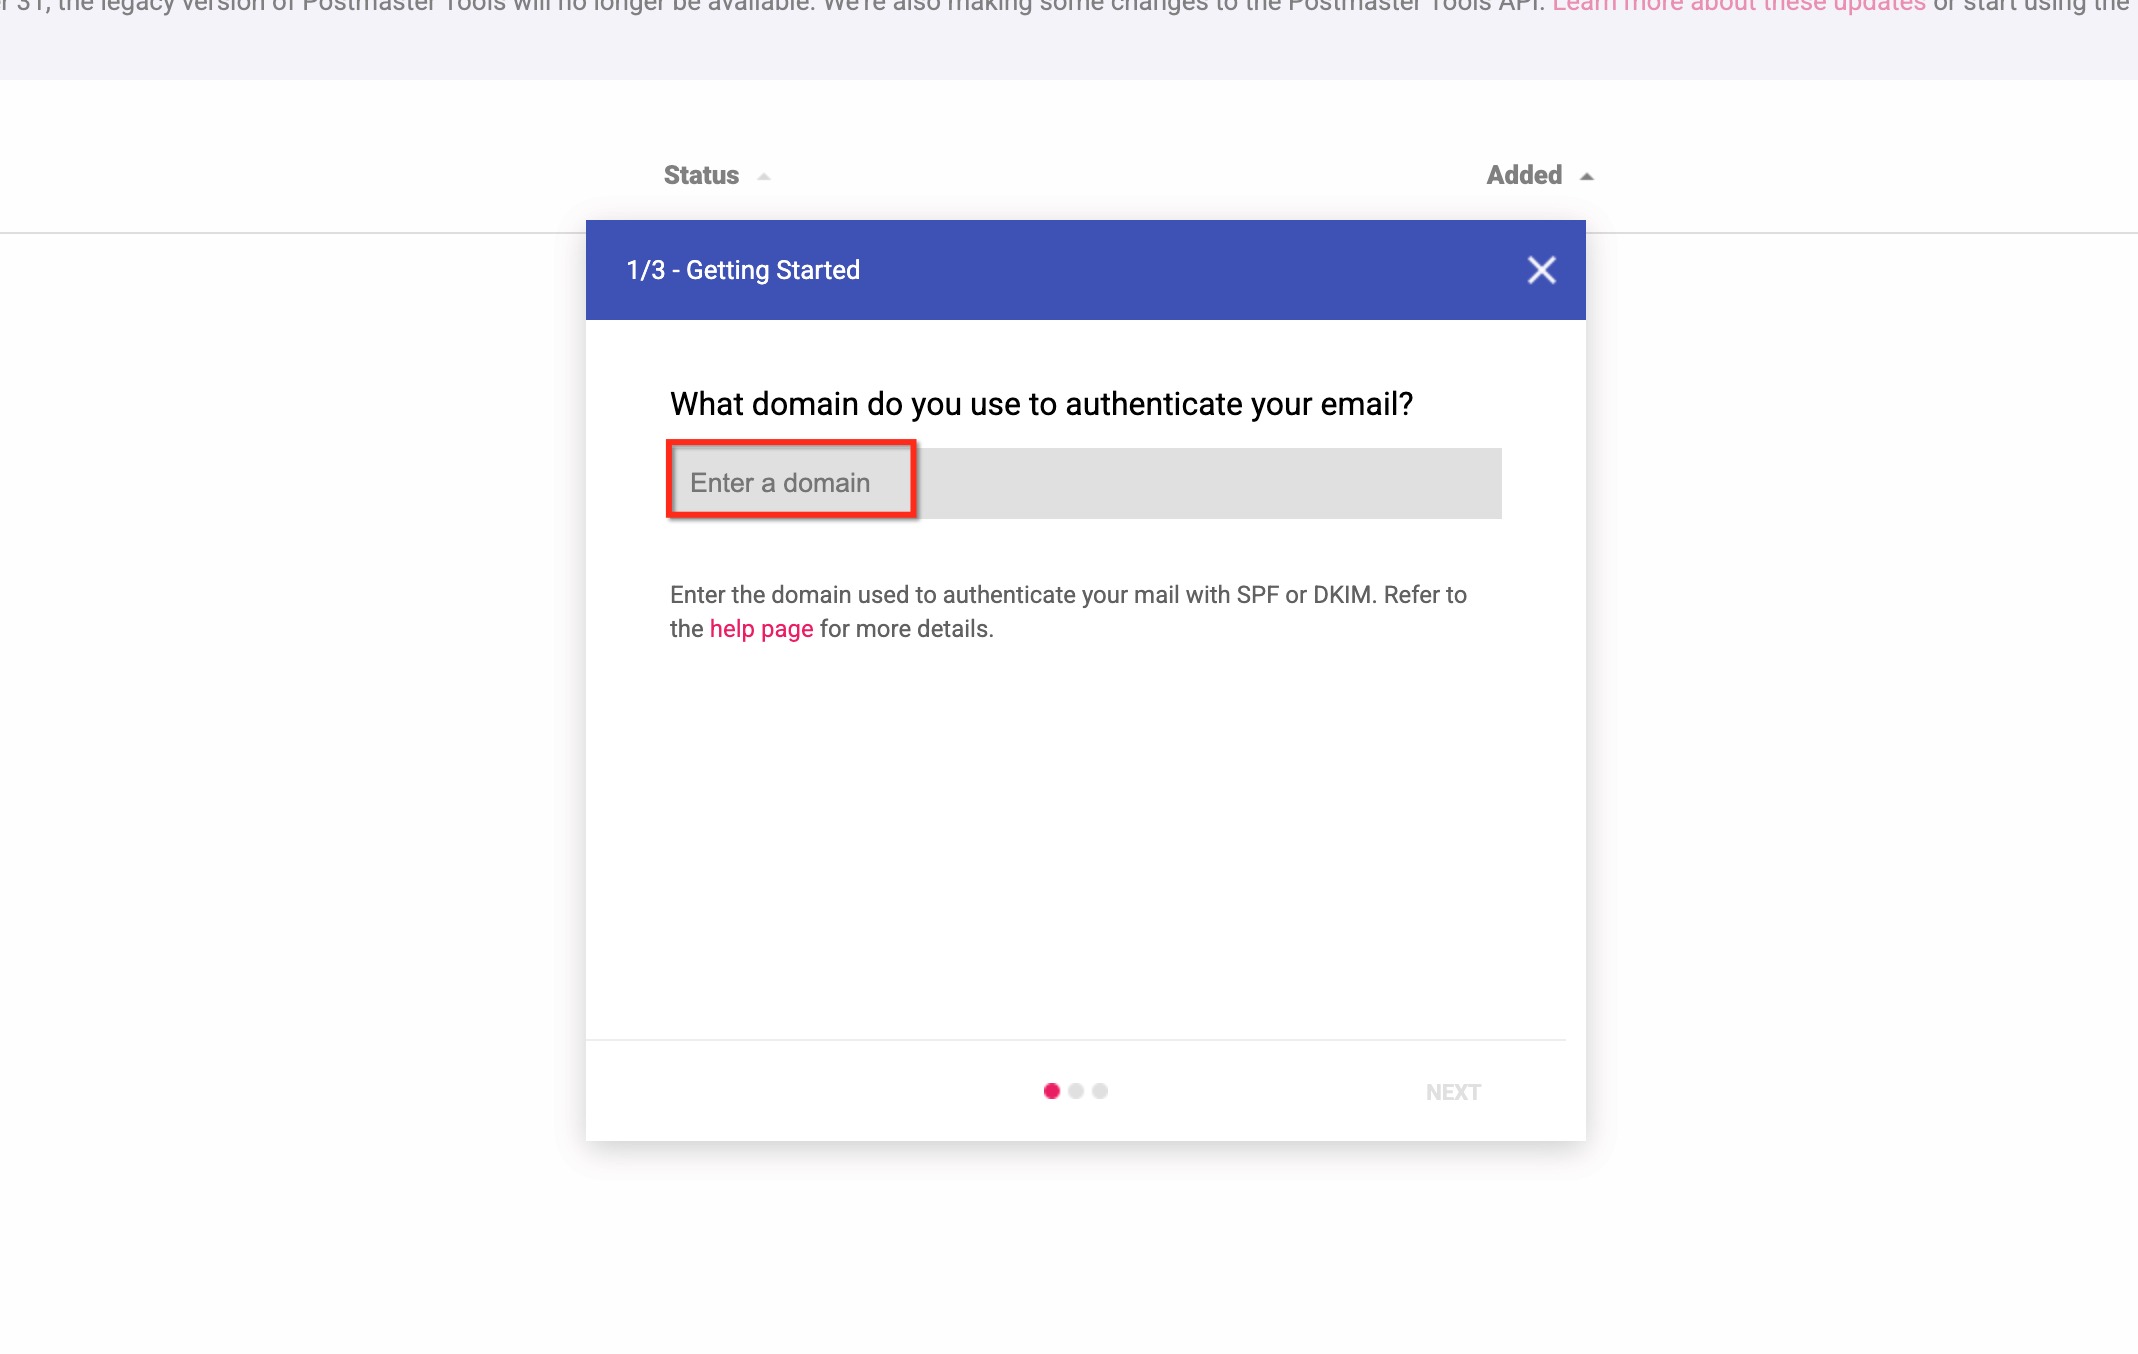
- Add your domain (e.g., yourbrand.com or mail.yourbrand.com).
- Choose Verify and copy the TXT record value provided by Google.
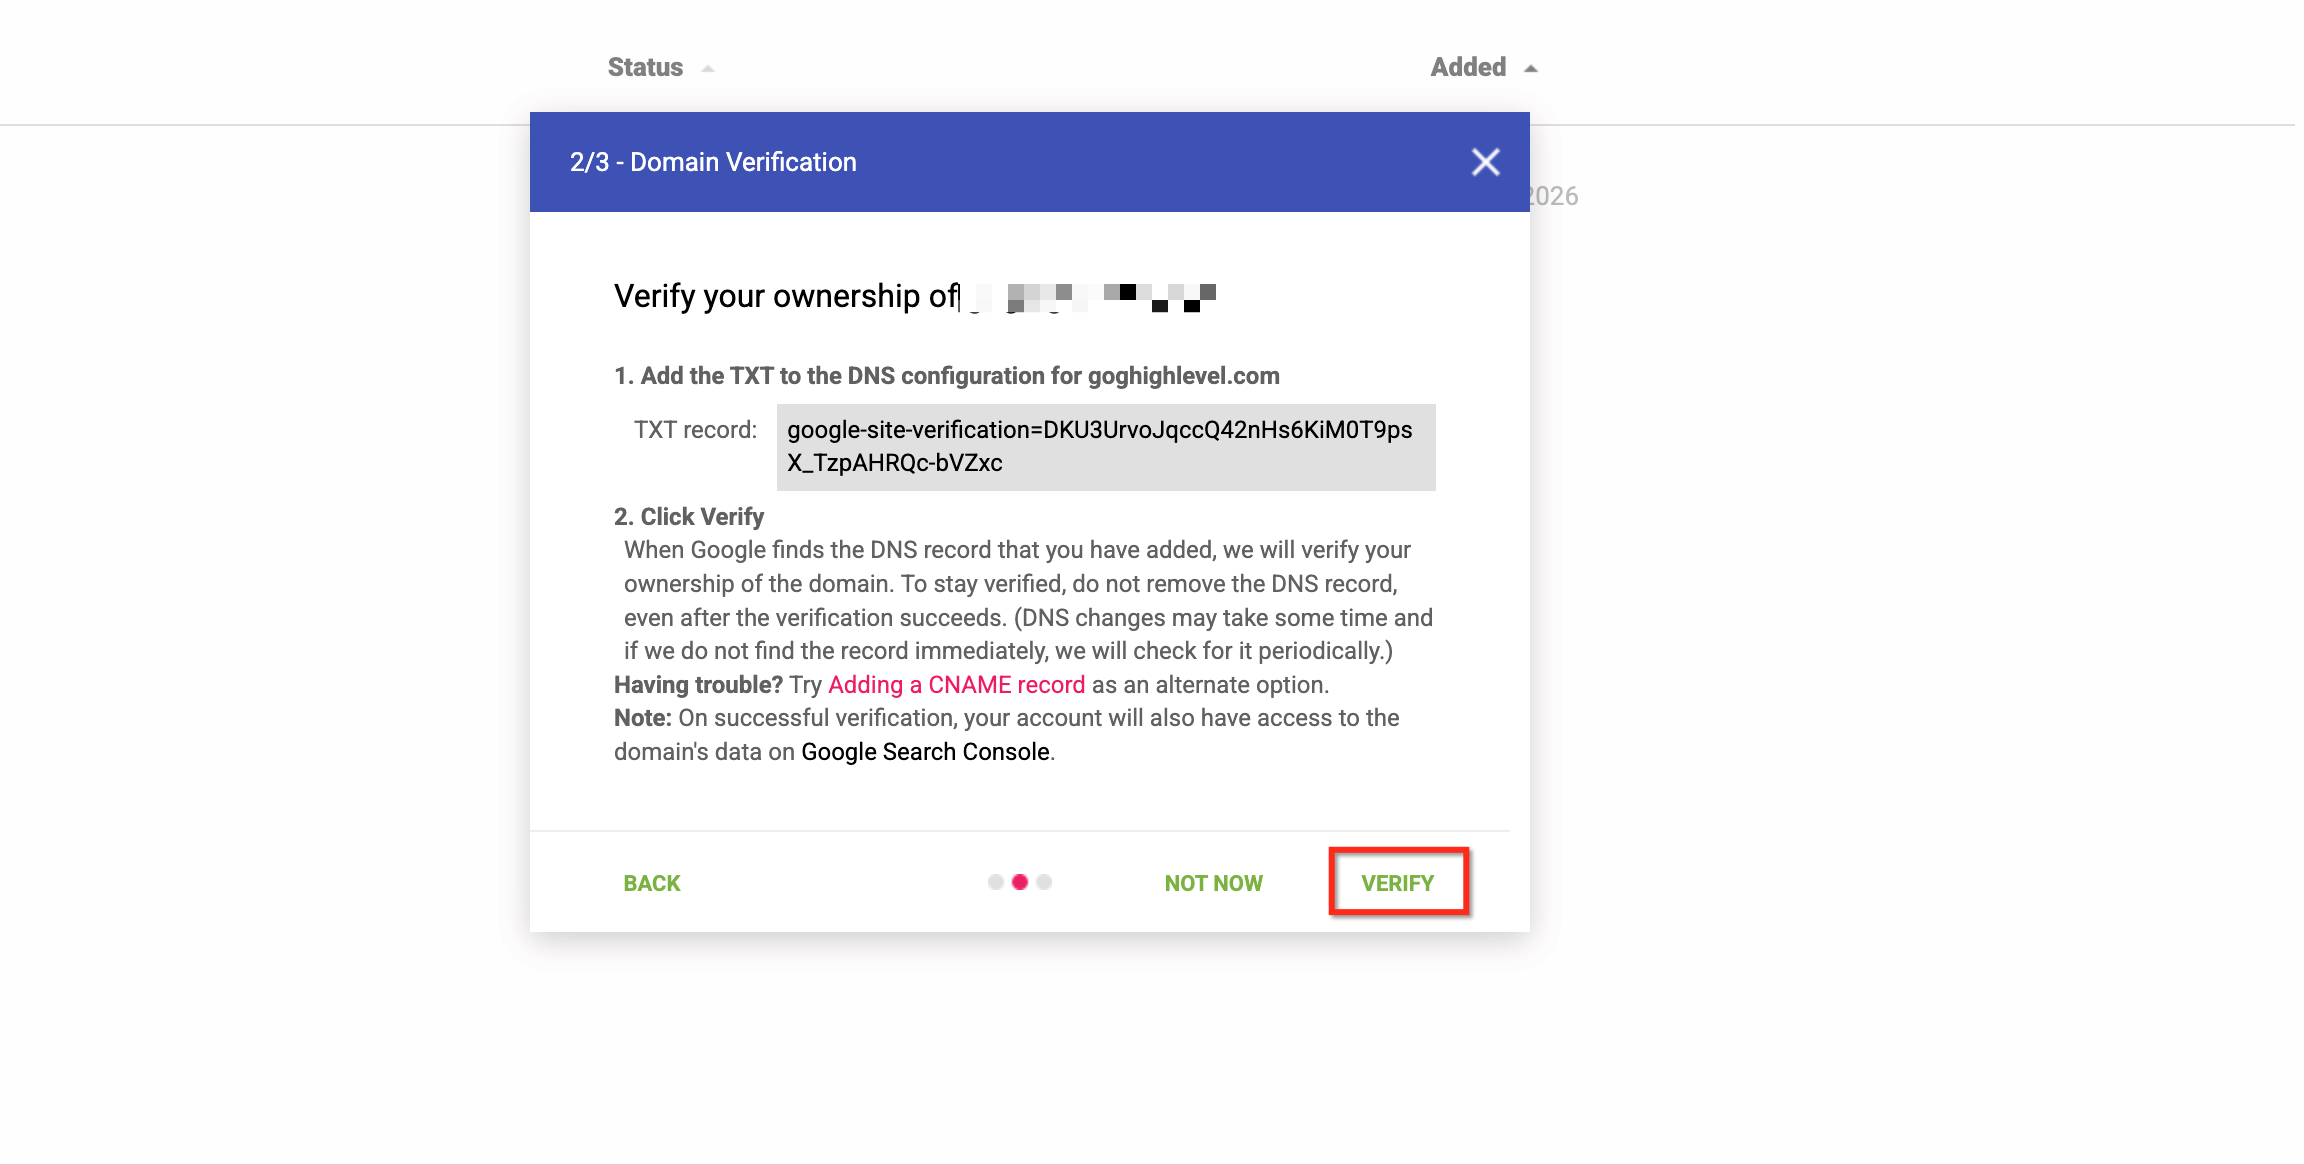
- In your DNS host, add the TXT record exactly as shown, then save/apply.
- Return to GPT and complete verification (Google may take some time to detect the record).
- Send email using your verified dedicated domain.
- Once Google receives sufficient email volume, review the Domain Reputation, IP Reputation, Spam Rate, Authentication, and Delivery Errors dashboards.
Troubleshooting Dedicated Sending Domains
While setting up your dedicated sending domain, you may run into some issues that can be resolved without contacting support. Below are some common issues and how to fix them.
Error Message: "Domain already pointing to email server!"
This error means your domain already has DNS records connected to a different service. You will need to disconnect the domain before connecting it to your account. Any MX or SPF records — even existing platform records — will cause the system to reject the domain and must be removed first.
You can look up your domain's MX and SPF records using a free tool like MXToolbox.
Frequently Asked Questions
Q: How do I choose a sending domain name for my account?
Use a unique subdomain that isn't used for any other purpose. A subdomain is a secondary part of your root domain. For example, if your dedicated sending domain is hello@mg.yourbrand.com, your subdomain is the "mg" portion.
Q: How do I set up a dedicated IP address?
Setting up a dedicated IP address is a separate process. Please refer to the dedicated IP setup guide for more information.
Q: What do I do if some of my domain's DNS records are not verified yet?
Force the verification process manually. If the DNS records still aren't verified after that, contact your hosting provider to resolve the issue.
Q: How do I generate an SSL certificate for dedicated sending domains?
When your domain is verified, the SSL certificate should be generated automatically. If the domain shows as verified but has no SSL certificate, try going through the entire verification process again. If that doesn't resolve it, contact your hosting provider.
Q: What if my domain has a wildcard DNS record?
If your domain has a wildcard record (e.g., *.yourdomain.com), you'll see a "pre-existing record" error when setting up a subdomain. Wildcard records act as catch-alls, so any subdomain already "exists" by default. To resolve this, temporarily remove the wildcard record and add it back after the dedicated domain is verified, or manually add DNS records for each subdomain to override the wildcard.
Q: Will my recipients see the refactored email address?
Yes, recipients will see the refactored sending address (e.g., support+yourbusiness.com@mg.msgsndr.com) in their email client.
Q: How can I prevent my email addresses from being refactored?
Set up a dedicated sending domain. With a dedicated domain, your emails will send with your exact from address — no modifications.
Q: Does this affect my reply-to address?
No. The refactoring only affects the sending address. Your reply-to address remains exactly as configured.
Comments
0 comments
Please sign in to leave a comment.